Tuesday, March 29, 2011
Almond Powder Puffs
This week’s Tuesdays with Dorie recipe was selected by Tianne of Buttercream Barbie. She chose the Pecan Powder Puffs, which are also known as Mexican Wedding Cakes or Russian Teacakes. These are a popular cookie around the holidays and I’ve made similar recipes before. Luckily, this recipe is wide open to variations so I was excited to figure out a way to mix this up a bit. If you want the original recipe, check out Tianne’s blog.
I looked at the variations that Dorie suggests and she suggests adding cocoa powder, but I had already made Hot Chocolate Snowballs which was too similar. In one of the variations, Dorie suggests adding spices, so I wanted to try using the flavors of chai, but I’d already made those, too. I’ve made too many things to keep track! I decided to go with almonds and I also added a little ground ginger. Ginger and almond seemed like a good combination.
Unlike the other variations of this cookie that I’ve made, you make these in the food processor. I usually like using that method, since it typically makes fewer dishes for me to wash. In this cake, the dough seemed really crumbly and I wondered if the dough got mixed properly. I refrigerated the dough overnight and had to let it warm up quite a bit before I could shape the cookies. Even after baking they are very crumbly, but that just makes them melt in your mouth. I didn’t think that I made my cookies very big, but I only got 20 cookies out of a full batch! These smelled heavenly of almonds. The ginger was very subtle, kind of like an aftertaste. They are very, very good and I was happy to try another variation of this classic cookie.
Recipe from Baking from My Home to Yours by Dorie Greenspan, page 156
Friday, March 25, 2011
Lemon Rum Madeleines
The library where I work isn’t that large and our staff is pretty small, but it seems like all of the birthdays come together in groups. We’ve had two birthdays this week, plus there are several birthdays in January and several at the end of October/early November. I don’t bake for all of the birthdays, but I do when I can.
My boss’s birthday is here and I know her favorite is Madeleines. I had made traditional Madeleines before, but since they’re my boss’s favorite cookie, I was on the look out to find another variation to try. I found this recipe online that was a lemon and rum variation. Somewhat traditional but not completely and they looked like they would be fairly easy to put together so I put them on the list to make. Someone else actually brought the birthday cake, but I wanted to make these as an extra treat.
These are quick to put together, but certainly give your mixer a good workout. I didn’t quite get the butter folded in as well as I would have liked, and you can certainly tell in the first batch that I baked. The second batch turned out much better once I completely mixed in the butter. These are light as a feather and I like the lemon flavor: it fits well with the delicate nature of the Madeleines. These aren’t quite picture perfect, but they taste really good. Happy Birthday Boss!
2/3 cup flour
1/4 teaspoon baking powder
1/2 cup butter, melted and cooled
2 large eggs
1 teaspoon rum
1/2 teaspoon lemon juice
1 cup powdered sugar
Preheat oven to 350 degrees. Butter or spray with cooking spray two Madeleine pans.
In a small bowl, combine flour and baking powder. Set aside. In a large mixer bowl, combine eggs, extract, and lemon juice. Beat on high for 5 minutes. Gradually add in powdered sugar. Beat another 5 minutes until thick. Gently fold the flour mixture into the batter. Then fold in the melted butter.
Spoon one tablespoon of batter into the center of each shell indentation. Don’t fill the Madeleines too full. Bake for about 8 minutes, or until edges are light brown. Allow to cool slightly before removing from the pan.
Recipe from http://en.petitchef.com/recipes/lemon-rum-madeleines-fid-833245
Tuesday, March 22, 2011
Honey Nut Brownies
This week’s Tuesdays with Dorie recipe was selected by Suzy of Suzy Homemaker. She chose Honey Nut Brownies. I love baking with honey and I was very excited to try this recipe. These brownies are light on the chocolate and heavy on the honey. I actually had another recipe for honey brownies, but once I knew these were coming up to make, I decided to wait and give these a try first. You can get the entire recipe on Suzy’s blog.
There was a lot of discussion among the Tuesdays with Dorie bakers about this recipe. Some were unsure of baking with honey and others wondered if different types of honey would make a difference. I ended up using wildflower honey from Washington State. I will often buy honey from vendors at farmer’s markets, but I’ve used up all I had bought last year and the markets haven’t started yet this year. I particularly like the cranberry honey that I get, but as you can imagine, that’s not very easy to find. I can’t wait for the farmer’s markets to start again!
These brownies turned out a little strangely for me. I don’t know what happened, but I got big empty holes on the bottom of my brownies. When I flipped them over to peel off the foil, it looked like there were these big sink holes. I have no idea what would have caused that. A pocket of sugar or honey? I’d usually blame a big chunk of butter, but the butter was melted. I also had to bake these longer than the specified time, but it seems many of the others had the same issue. The texture is inconsistent, kind of like in some areas the honey sunk to the bottom of the brownie, where other areas were very cakey. At any rate, they are pretty tasty and have an interesting flavor.
Recipe from Baking from My Home to Yours by Dorie Greenspan, page 102
Monday, March 21, 2011
Bourbon Almond Cake with Chocolate Frosting
This cake started its life as a Bourbon Ball Cake but I ended up changing it fairly extensively. I really like bourbon balls and I often make those at Christmas. They’re the perfect cookie when you are baking a lot since you can make them early and they get better the longer they sit. This cake called for the bourbon, but other than that I’m not sure how the cake was similar to a bourbon ball. None the less, it looked intriguing and couldn’t wait to give it a try.
This cake was originally a combination of ground almonds, chopped pecans, and bourbon. I wanted to make this more of an almond cake and had hoped to use Amaretto rather than bourbon, but I didn’t have enough on hand. So I kept that the same but didn’t want to have two different types of nuts, so I omitted the chopped pecans that you were supposed to add to the batter. I thought that the cake might not turn out since I had taken out a fairly significant ingredient but I hoped for the best. I also baked this in two 9” pans rather than three.
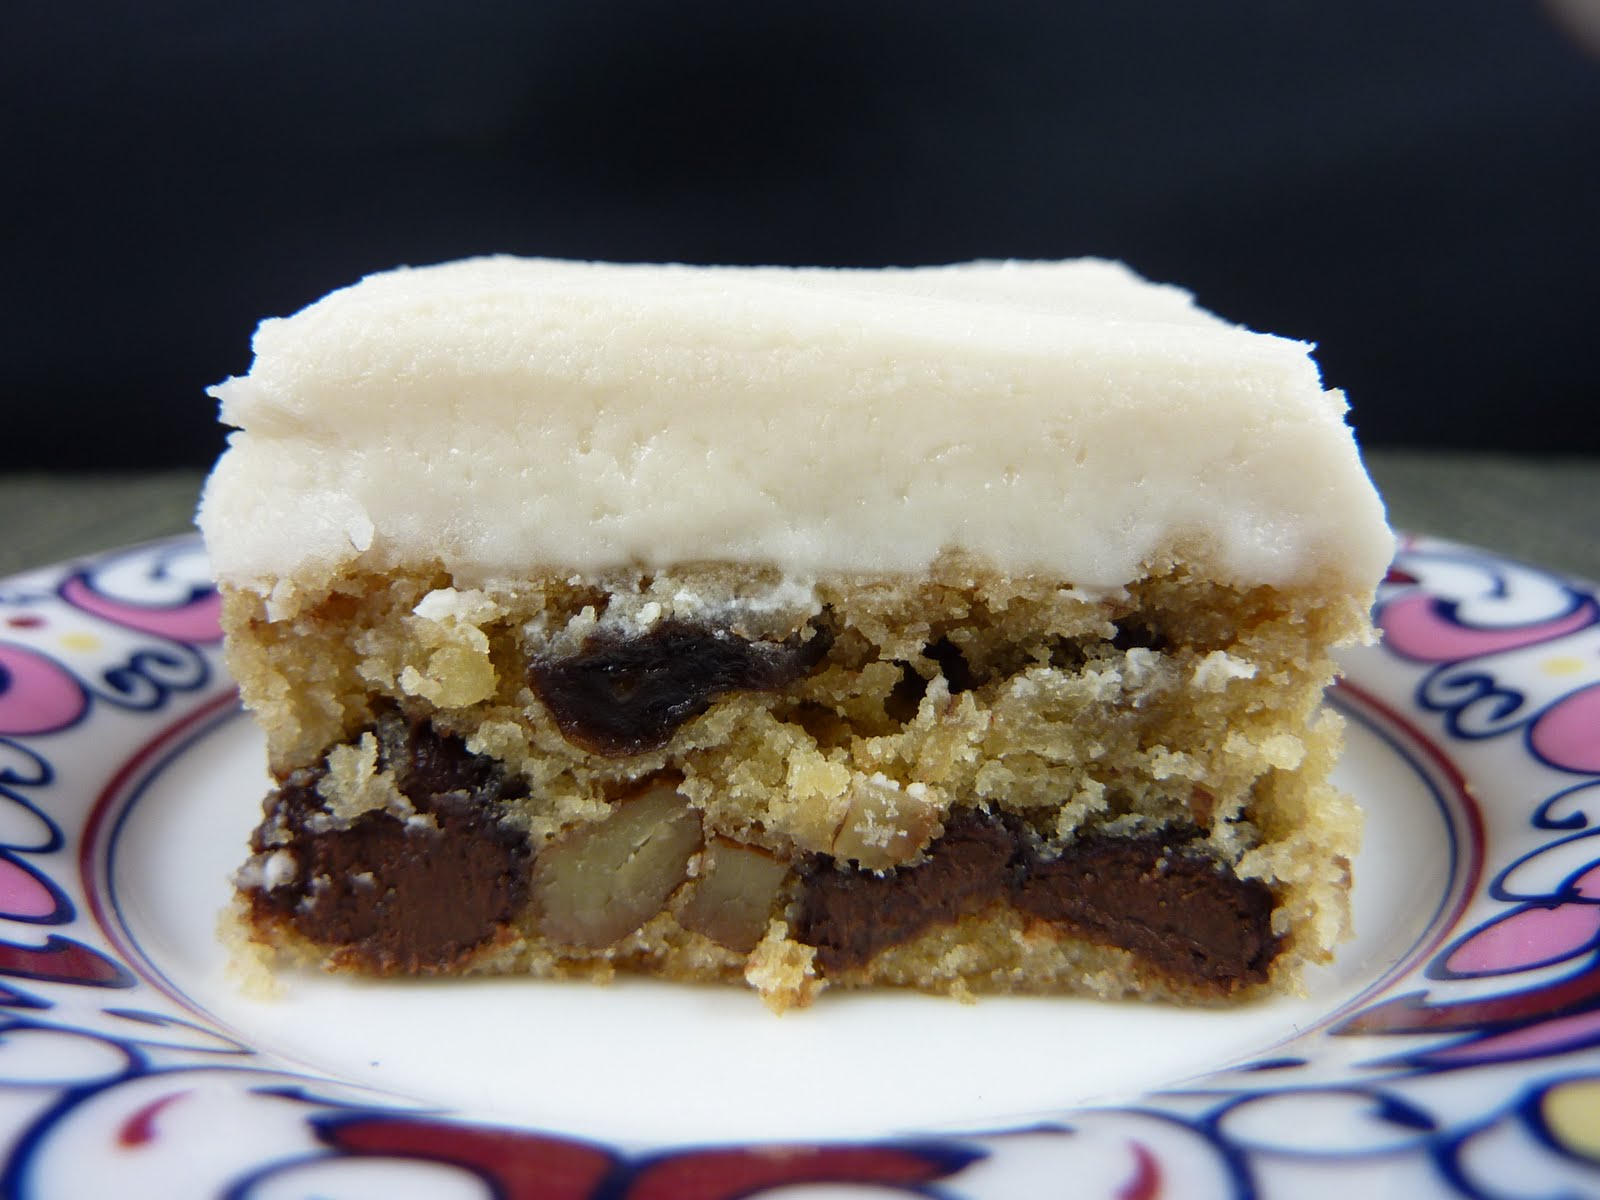
The cake baked up just fine, and in the end the texture was excellent! It was sweet but the almonds added a great flavor. I paired it with the chocolate frosting which was a nice addition. This was a different style of frosting, with a lot of butter, and it was nice and fluffy. The final touch of the original cake was to top it with chocolate ganache, but I skipped that since my ganache didn’t turn out. I’ve made ganache how many times and it didn’t turn out? Oh well, I decorated it with sliced almonds and that added a nice classy touch. I took this to work to celebrate my colleague’s birthday and it was very popular. I think there was only one slice left after I cut the cake!
1 1/2 cups all flour
1 cup ground almonds
1 teaspoon baking powder
1/2 teaspoon baking soda
1/2 teaspoon salt
1 cup butter, softened
2 cups sugar
4 large eggs
1/2 cup bourbon
1/2 cup sour cream
Sliced almonds, for decoration
Preheat oven to 350 degrees. Butter two 9-inch cake pans. Line bottoms of pans with parchment paper; butter paper.
Whisk flour, ground almonds, baking powder, baking soda and salt in medium bowl to blend. In a large mixer bowl, beat butter and sugar until fluffy. Add eggs 1 at a time, beating until well blended after each addition. Whisk together bourbon and sour cream. Beat in dry ingredients in 3 additions alternately with sour cream mixture in 2 additions, beginning and ending with dry ingredients. Divide batter between the pans.
Bake cakes until tester inserted into center comes out clean and cakes begin to pull away from sides of pans, about 32-35 minutes. Cool cakes in the pans for 10 minutes. Run small knife around pan sides to loosen cakes. Turn cakes out onto racks; peel off parchment paper. Allow cakes to cool completely before frosting.
1-1/2 cups butter, softened
9 ounces semisweet chocolate, melted and cooled
1 tablespoon milk
2 cups confectioner’s sugar
Beat butter on medium-high speed until light and fluffy, about 2 minutes with a stand mixer. Add milk and beat until incorporated. Add the confectioner’s sugar 1/2 cup at a time until incorporated. Beat on medium-high speed for one minute. Add melted chocolate to butter and sugar. Beat on medium-high speed for another 1 to 2 minutes, or until light and fluffy.
Place one layer on your cake platter. Top with chocolate frosting. Add second layer and top with frosting. Cover the sides of the cake with a thick layer of chocolate frosting. If desired, push sliced almonds into the side of the cake. Store cake in the refrigerator, but allow it to set at room temperature for at least one hour before serving.
Recipe adapted from Simply Sifted
Friday, March 18, 2011
Krispies
I’m still trying to use up that box of crispy rice cereal that I bought a while back! This is a recipe from a book that I haven’t used in a long time: Mrs. Fields Cookie Book. More the rage in the 1980s than now, there are a couple of recipes in this book that I am extremely fond of. This is one of them: cookies with crispy rice cereal and chopped up Crunch bars. How could you go wrong?
This cookbook has one oddity: all the recipes bake at 300 degrees for around 20 minutes a batch. I guess that this may work in a commercial kitchen, but I find that they just don’t bake up quite right in my kitchen. I baked these at normal cookie baking temperature, 350 degrees, for a shorter amount of time (11 minutes in my case).
I’ve made these cookies many, many times, and it was fun to make them again. My husband came to the conclusion that you could chop up almost any candy bar and add it to this recipe, and I agree, you could add many kinds of chopped candy bars. I once made these with a leftover crispy rice chocolate bunny from Easter that I chopped up! They are sweet and chewy but also have that crunch from the crispy rice cereal. I really enjoyed making these again and I hope you’ll give them a try.
2 cups flour
¼ teaspoon salt
1 teaspoon baking soda
½ cup brown sugar
½ cup sugar
¾ cup butter, softened
1 egg
2 teaspoons vanilla
1 cup crispy rice cereal
6 oz. crispy rice chocolate bars, chopped
Preheat oven to 350 degrees. Line two baking sheets with silicone baking mats.
In a small bowl, combine flour, salt, and baking soda; set aside. In a large mixer bowl, beat brown sugar, sugar, and butter. Add the egg and vanilla. Beat on medium until fully combined. Add flour mixture and stir on low until combined. Stir in the crispy rice cereal and the chopped chocolate bars. (I did this by hand.)
Drop by teaspoonfuls onto the prepared baking sheets. Bake for 10-12 minutes until set and light golden brown. Transfer cookies with a spatula to a wire rack to cool completely.
Recipe from Mrs. Fields Cookie Book
Thursday, March 17, 2011
St. Patrick’s Day Swirls
My friend sent me this recipe and I thought it would be a nice festive cookie to make for St. Patrick’s Day! I had made swirl cookies years and years ago and I figured it was high time to make them again. The recipe gave a chocolate variation and a plain variation; I decided to stick with the plain variation. With lots of almond extract in the dough, they aren’t very plain!
Once I started making these, I was reminded why it had been so long. The dough for these cookies is very soft and is tricky to work with. I had to use lots of flour when I was rolling these out since they were so sticky. If I made these again, I think I would decrease the amount of milk in the dough and see if that helped. I did get them together but I extended the refrigeration times to help make the dough easier to handle.
My husband was a bit skeptical about these cookies because he said he’d had them before and they were pretty but didn’t have much flavor. He even liked the dough for these so he thought they were a big improvement. They sliced and baked beautifully, so you almost forget that the dough was a little challenging to work with. Happy St. Patrick’s Day!
¾ cup butter, softened
I cup sugar
1 egg
¾ teaspoon salt
1/3 cup milk
2 teaspoons almond extract
¾ teaspoon vanilla
2-1/2 cups flour
Green food coloring
1 egg white, beaten
In a large mixer bowl, beat the butter and sugar until fluffy. Add the egg and the salt, stirring to combine, and then add the milk and extracts. Gradually add the flour and stir until combined.
Divide the dough into two halves. Color one half with the green food coloring. Pat each half of dough into a rectangle and wrap in parchment or plastic wrap. Refrigerate for at least an hour.
On a lightly floured surface, roll each piece of dough until ¼” thick. My rectangles were approximately 11” x 9”. Place the rolled out rectangles on parchment and refrigerate for about 20 minutes.
Brush the top of the plain dough with beaten egg white. Place the green dough on top and press down. Starting on a long side, roll the dough into a tight swirl. Brush the seam edge with egg white and pinch to seal. Wrap in parchment paper and refrigerate at least an hour.
Preheat oven to 350 degrees. Line two baking sheets with silicone baking mats.
Slice the dough into ¼” slices and place on the prepared baking sheets. Bake for 16-18 minutes until done but not browned.
Recipe from Ladies Home Journal
Tuesday, March 15, 2011
Citrus Currant Sunshine Muffins
This week’s Tuesdays with Dorie recipe was selected by Lauryn of Bella Baker. She chose the Citrus Currant Sunshine Muffins. These muffins are a wonderful springy citrus muffins flavored with orange and lemon. You can get the complete recipe for these muffins on Lauryn’s blog. These are really great and exactly what I needed. The Seattle area is not yet experiencing spring; it’s pretty grey and soggy. I’m really looking forward to better weather!
I like baking with currants, but I don’t very frequently. I used to get orange currant scones at work, but the coffee shop doesn’t carry those anymore. I like the small bites of sweetness that they add. I know that many of the Tuesdays with Dorie bakers chose other dried fruit for these muffins, and I’m sure that’s good too, but I was happy for the opportunity to use currants.
I didn’t have the lemon extract that the recipe required, but I don’t think it is missing that much. I also used store bought orange juice instead of squeezing my own, but I did splurge for the fancy stuff that is pretty close to fresh squeezed. Since I took these to work, I made 1-1/2 times the recipe and ended up with 21 muffins. These muffins were really what I needed after this gloomy rainy winter we’ve had!
Recipe from Baking from My Home to Yours by Dorie Greenspan, page 7
Friday, March 11, 2011
Bourbon Fruit and Nut Bars
I had made bourbon bread pudding a couple of weeks ago and had discovered this wonderful sweet tea bourbon. It sounds a little unusual, but it was so good that we bought a bottle of it. I’ve been looking for different recipes that use bourbon. I have quite a few recipes bookmarked and I decided to make these first. Boozy cookies on Friday are always good.
These bars started out as Tennessee whiskey fruit and nut bars, and since bourbon is bourbon whiskey, I figured this would be good. My bourbon is from Kentucky, but close enough. These contain quite a bit of bourbon: bourbon in the dough, more in the frosting and I even soaked the raisins in the bourbon. Some of that bakes out, but not all of it! You can certainly taste the bourbon, but this bourbon is also quite sweet.
The dough for these seems more like cake batter and I guess these are quite cake-y. I thought that this might taste a little bit like Christmas cake (fruitcake, but really different than American fruitcake) since that traditionally has fruit and nuts and is laced with alcohol, but these were different. The bars are a little drier than expected, but the frosting adds the perfect touch. I really liked these and I look forward to trying all the other recipes that I found that use bourbon.
1 -1/2 cups flour
3/4 teaspoon baking powder
1/4 teaspoon salt
2/3 cup butter, softened
3/4 cup packed brown sugar
1 -1/2 teaspoons vanilla
2 eggs
1/3 cup bourbon
1 cup chopped pecans, toasted
1/2 cup raisins
1/2 cup chocolate chips
3-1/2 cups powdered sugar
6 tablespoons butter, softened
3 tablespoons bourbon
1 teaspoon vanilla
Preheat oven to 350 degrees. Grease a 9×13-inch baking pan.
In a small bowl, combine flour, baking powder, and salt. In a large mixer bowl, cream together the butter, brown sugar, and vanilla until fluffy. Beat in the eggs, one at a time. Alternately add the flour mixture and the bourbon in three additions, mixing until fully combined after each addition. With a spatula, stir in the chopped nuts, raisins, and chocolate chips. Spread the batter in the prepared pan.
Bake for 20 to 25 minutes or until a toothpick inserted in the center comes out clean. Let bars cool in the pan on a wire rack.
To make the frosting, in a large mixer bowl, beat together the powdered sugar, butter, bourbon and vanilla until smooth. If needed, add additional bourbon (or milk) to make the frosting spreadable. Spread the frosting over the cooled bars and then cut into squares.
Recipe adapted from Recipes From The Road by Jamie and Bobby Dean and Melissa Clark
Wednesday, March 9, 2011
Nutella Fudge Crispy Treats
World Nutella Day is actually February 5th, but I always forget until I see the great recipes that different bloggers have made. Maybe one of these days I will remember! Loyal readers will know that I am a big fan of the chocolate hazelnut combination, so I love Nutella. I don’t need to wait for a holiday to make something with Nutella.
I had purchased a big box of crispy rice cereal for the Ranger Cookies I recently made and, honestly, I don’t like eating this type of cereal as regular cereal. So I was on the hunt for recipes to use up the cereal and my husband sent me this one. It looked so good and I had the (adapted) ingredients on hand. They are a no bake cookie, so I probably should have saved these for a day when I wanted to keep the house cool, but I didn’t want to wait.
The original recipe for these is probably healthier than how I made them. I used corn syrup instead of brown rice syrup and I just used regular crispy rice cereal instead of a natural/organic variety. I also used plain crispy rice cereal instead of cocoa crispy rice cereal. The base had cocoa powder and Nutella (chocolaty itself) so I figured that it wouldn’t make a difference. The base is a little softer than regular crispy treats, since the chocolate soaks into the cereal a bit. These are really great and if you are a Nutella fan like I am, you’ve got to give these a try.
4 ounces Nutella
1/3 cup corn syrup
1 tablespoon vanilla
¼ cup milk
1/2 cup cocoa powder
dash salt
4 cups crispy rice cereal
1/2 cup chocolate chips
8 ounces Nutella
5 ounces dark chocolate, chopped
Line a 9” square baking pan with parchment paper, set aside.
In a large saucepan combine the Nutella, corn syrup, vanilla, and milk. Over medium low heat, whisk the mixture until completely melted. Add the cocoa powder and salt. Whisk to combine.
Remove mixture from the heat and immediately add the crispy rice cereal and chocolate chips. Stir the mixture until all of the cereal is evenly coated with the chocolate mixture. Press into the prepared pan. Set aside.
Put the chopped chocolate in a microwave safe bowl, melt the chocolate in 30 second increments, stirring every 30 seconds. Once the chocolate is almost melted, add the Nutella and microwave for an additional 30 seconds. Stir until mixture is completely smooth. Pour the Nutella/chocolate mixture over the base until evenly coated and smooth. Refrigerate until set, about 2 hours, before cutting into squares.
Recipe from Cream Puff to Health Buff, who adapted the recipe from Clean Start by Terry Walters
Tuesday, March 8, 2011
Corniest Corn Muffins
This week’s Tuesdays with Dorie recipe selected by Jill of My Next Life. She chose the Corniest Corn Muffins. These muffins contain cornmeal and corn kernels, which gives them a nice corn flavor. You can get the complete recipe on Jill’s blog. This is a good basic recipe, which lends itself to many variations. If you’d like to see how the other Tuesdays with Dorie bakers did with this week’s recipe, visit the Tuesdays with Dorie blog.
I really like corn, but my husband does not so I was looking forward to making these. He’s ok with cornbread, but doesn’t like corn kernels. I got to buy a big bag of frozen corn to use some in this recipe and I’m excited that I get to eat the leftovers! I’ve made different corn muffins and cornbread at home and it’s never as good as what I get when I’m eating out.
These came together so fast, I couldn’t believe it! I halved the recipe and still got 7 muffins (which I shared with some of my friends at work). I was worried about them remaining fresh, but mine still seemed pretty good the second day. These are pretty good corn muffins, but as luck would have it, we went out to dinner that night at a restaurant that had really great cornbread. These muffins are pretty good, but not as good as that cornbread (which I’m sure has way more sugar and butter)! The cornmeal that I use is really coarse, so it adds a great crunch. I liked these quite a bit and they’d be the perfect pair to chili!
Recipe from Baking from My Home to Yours by Dorie Greenspan, page 4
Friday, March 4, 2011
Peanut Butter Cookies with Mini Peanut Butter Cups
It seems like lately when I look at recipes to make, I have been gravitating to bar cookies. I try not to be too repetitive, so I didn’t want to go to the first recipe I came across. Instead, I decided I would use up an ingredient that I had in the cupboard: mini peanut butter cups. I had purchased these at Trader Joe’s a while back. I didn’t know what I would make with them, but I knew I could come up with something.
I don’t usually innovate recipes all that much, but it is something that I’d like to work on. I had a couple of ideas about what I wanted to do and I did a couple of searches on the web to see if that could spark any ideas. I originally wanted to make some sort of peanut butter cookie with cocoa powder, so the cookie would be chocolaty and so would the peanut butter cups. I couldn’t quite find a recipe that I wanted to use, so I defaulted to a regular peanut butter cookie.
If you don’t have a Trader Joe’s near you, you could always use chopped up peanut butter cups or even chocolate chips (but that wouldn’t be quite the same). I am so pleased with how they turned out. They are a basic, hearty cookie that is just a little bit special. The mini peanut butter cups are soft and gooey and add to the richness of the cookie. I doubled the recipe, which made quite a few, so you may want to stick with the original quantities in the recipe.
1/2 cup butter, softened
1/2 cup peanut butter
1/2 cup sugar
1/2 cup brown sugar, firmly packed
1 egg
1-1/4 cups flour
1/2 teaspoon baking powder
1/2 teaspoon baking soda
1/4 teaspoon salt
1 cup mini peanut butter cups
Preheat oven to 375°. Line two baking sheets with silicone baking mats.
In a large mixer bowl, cream the butter, peanut butter and sugars until light. Add the egg and mix until fluffy. In a separate bowl, combine the flour, baking powder, baking soda, and salt. Add this to the creamed butter mixture and mix in low until combined. Stir in the mini peanut butter cups by hand.
Drop cookie dough by teaspoonfuls onto the prepared baking sheets. Bake for 10-12 minutes or until golden brown. Allow to cool for several minutes on the baking sheet before removing to a wire rack to cool completely.
Recipe adapted from http://southernfood.about.com/od/chocchipcookies/r/blbb329.htm
Tuesday, March 1, 2011
Chocolate Pots de Crème
This week’s Tuesdays with Dorie recipe was selected by Christine of Black Cat Cooking. She chose Chocolate Pots de Crème, which at first glance are something like chocolate puddings, but they are so much more than that. You can get the complete recipe on Christine’s blog. These look simple, and have a simple list of ingredients, but they are quite special.
There are a lot of custard-based recipes in Dorie’s book, but this one is different as Dorie explains. These you cook in a water bath and that’s what thickens the Crème. I halved this recipe and made four beautiful pots. I guess that they sell special containers with lids that are especially for Chocolate Pots de Crème! How fun would that be? I instead used some cups from a Denby coffee service that belonged to my husband’s parents. It’s been around, but Denby is great stuff.
My Crème set wonderfully and these have a silky, mousse-like texture. The chocolate flavor is good, but not overpowering. This is the perfect little finisher for a fancy meal, or just a nice treat to have around the house. I have to say that I didn’t quite know what to expect from these, and I was pleasantly surprised. I was really happy with this recipe and I absolutely will make these again!
Recipe from Baking from My Home to Yours by Dorie Greenspan, pages 390-391
Subscribe to:
Posts (Atom)