Friday, September 30, 2011
Vermont Maple Cookies
Ok, so I don’t know if I can officially call these “Vermont” cookies as the key ingredient, maple sugar, is from Pennsylvania. I purchased the maple sugar back in the spring when I visited Philadelphia, and I’ve not used it up all that much. I was glad that I hadn’t used my stash as this recipe calls for an entire cup of maple sugar. The recipe in the cookbook gives a long explanation how they tried combination of brown and maple sugars to get the right flavor, and that it’s really best with the full amount of maple sugar. You may be able to find maple sugar at health food stores if it’s something you can’t find otherwise.
This cookie has layer upon layer of maple: maple sugar in the dough, a maple/sugar coating, and maple glaze. You get the robust maple flavor with maple sugar, maple flavor, and maple syrup. For me, finding the maple flavor was the hardest part, as I try my best to avoid artificial flavors. I’d go to the store and there’d be a spot for the maple flavor, but no actual product. And this wasn’t recent when everyone is doing their fall baking!
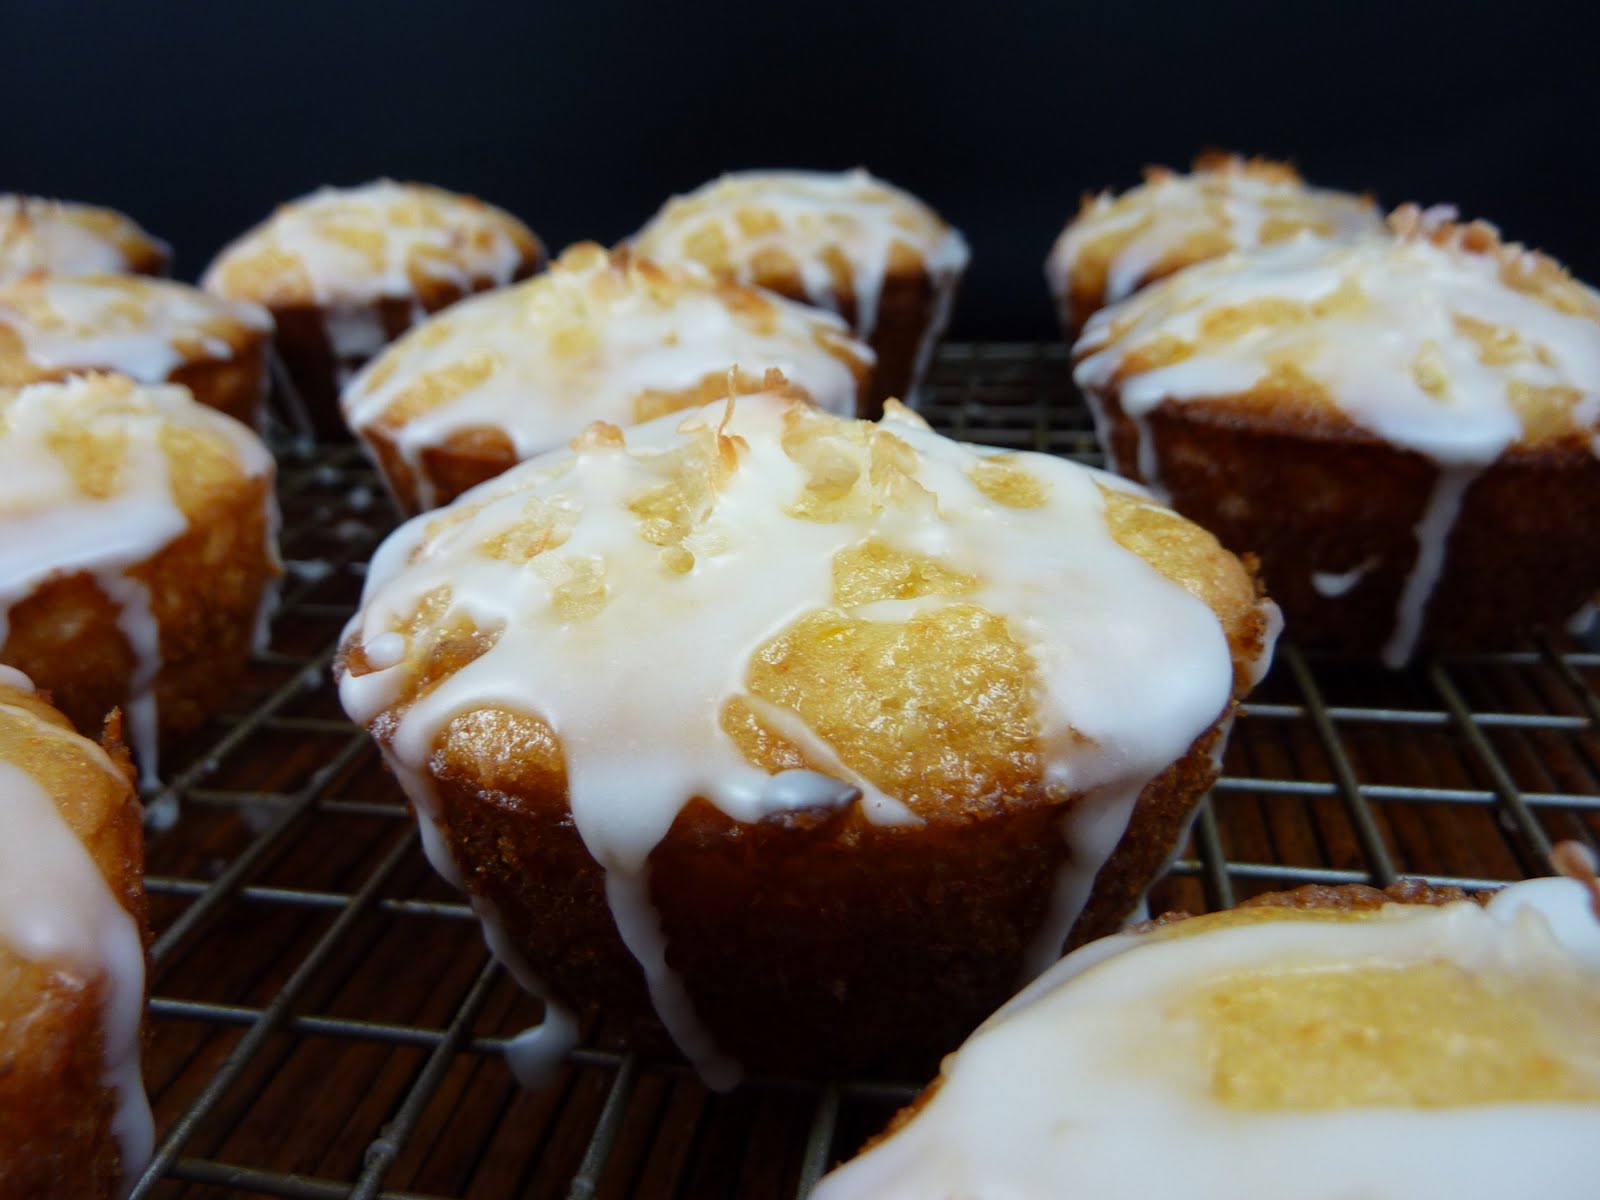
Well, with all the ingredients in hand, these were not difficult to put together. The dough is pretty sticky so I would refrigerate them for longer to make the dough easier to work with. The glaze took the longest, since I brushed mine on the cookies with a brush that was simply too large. Oh well! These are reminiscent of snickerdoodles, but the maple flavor puts them over the top. These are a great cookie for fall, very homey.
1 cup butter, room temperature
1 cup maple sugar
½ cup sugar
1 teaspoon cream of tartar
½ teaspoon salt
2 eggs
½ teaspoon baking soda
1 teaspoon maple flavor
2-3/4 cups flour
2 tablespoons maple sugar
2 tablespoons sugar
1-1/2 cups powdered sugar
2 tablespoons maple syrup
1-2 tablespoons milk
A few drops maple flavor
In a large mixer bowl, combine the butter, sugars, cream of tartar, salt, eggs, baking soda and maple flavor. Mix on medium until light and fluffy. Add the flour and stir just until combined. Wrap the dough in waxed paper and refrigerate at least 30 minutes until it is easier to handle.
Preheat oven to 400 degrees. Line 2 baking sheets with silicone baking mats.
In a small bowl, combine the maple sugar and sugar. Shape the dough into 1-inch balls and roll them in the sugar mixture. Place them on the prepared baking sheets and bake for 10-12 minutes, until light brown. Allow to cool for 5 minutes on the baking sheet and then remove to a wire rack to cool completely.
Make the glaze: in a medium bowl combine the powdered sugar, maple sugar, 1 tablespoon milk and maple flavor. Stir to combine. If the mixture is too thick to glaze the cookies, add additional milk. Brush the glaze on the cooled cookies and allow the glaze to harden.
Recipe from King Arthur Flour Cookie Companion
Labels:
Maple,
Shaped Cookies
Tuesday, September 27, 2011
Flip-Over Plum Cake
This week’s Tuesdays with Dorie recipe was picked by Becky of Project Domestication. She chose the Flip-Over Plum Cake. This is a really simple to put together cake that is very interesting. You start with the cake batter on the bottom and the plums on the top, but when it’s done baking, the plums become the base and the cake is on the top. You can get the complete recipe on Becky’s blog and also check out the links on the Tuesdays with Dorie page. Since plums weren’t available for everyone, there are lots of variations this week.
This calls for Italian (prune) plums, which are not always easy to find. I like plums and eat them a lot when they are in season. I hadn’t bought any in a while and I was worried that I’d have trouble finding them. After a fun filled weekend, I stopped at the regular grocery store and much to my surprise, they had Italian plums (and they were inexpensive, too!). I bought a bunch and happily went home to make the cake.
I hadn’t read the recipe before I started, but it was very easy to make. No mixer required, just a bit of hand mixing. I thought it might be like an upside down cake, but instead the flipping happens while baking. I let this cool and then hopefully cutting a clean piece to photograph. These sorts of things are so hard to photograph, but what they may lack in beauty they make up in taste. My husband thought that I had used rhubarb, but I didn’t get that at all. I guess the plums are a bit tart, but I knew what was in it so to me it tasted like plums! This was a fun cake to make and gave me a chance to try Italian plums for the first time.
Recipe from Baking from My Home to Yours by Dorie Greenspan, on page 42
Labels:
Cakes,
Tuesdays with Dorie
Monday, September 26, 2011
Macadamia Blossoms
This is macadamia recipe #1, inspired by our recent trip to Hawaii. I bought a lot of macadamia nuts when I was there, but I already had macadamia recipes in mind before we left. While we were there, we saw Hershey’s Kisses with macadamia nuts, which I think must only be available in Hawaii (or by special order). We bought them, not knowing exactly what to do with them. After all, you could just eat them!
I thought about the Christmas cookie classic: peanut blossoms. Instead of a peanut butter cookie topped with a Kiss, why not a macadamia butter cookie topped with macadamia chocolate Kisses? I knew you could make your own macadamia butter by setting it in a food processor and letting it work until it did its magic. So I decided to try that. I used unsalted macadamias, so my butter was a little bland. I added more salt to the recipe to compensate. So if you try to make your own macadamia butter, vary the salt based on the saltiness of the nuts.
The macadamia butter takes a little bit of time. My husband couldn’t figure out what I was making in the food processor that took so long! The butter isn’t quite as smooth as peanut butter, but it’s really very close. The cookie dough was a bit soft because the macadamia butter wasn’t quite as solid, so I refrigerated it a bit to help it set. These cookies are so good! They have the great flavor of macadamias which pairs perfectly with the macadamia Kisses. The flavor improves as they age (not that they lasted very long!) and go from soft to slightly crisp. These were a huge success!
Macadamia Blossoms
About 1 cup macadamia nuts
1/2 cup sugar
1/2 cup firmly packed brown sugar
1/2 cup butter, softened
1 egg
1 teaspoon vanilla
1/4 teaspoon salt
1 3/4 cups flour
1 teaspoon baking soda
1/4 cup sugar
48 macadamia chocolate candy kisses, unwrapped
Heat oven to 375 degrees. Line two baking sheets with silicone baking mats.
In a food processor, add the macadamia nuts. Process until smooth and the consistency of peanut butter. You will have to stop the processor and stir the mixture occasionally. Keep processing and stirring until you reach the right consistency. Measure ½ cup of macadamia butter and set aside.
Combine 1/2 cup sugar, brown sugar, butter and macadamia butter in large mixer bowl. Beat at medium speed until light and fluffy. Add egg, vanilla and salt; continue beating until well mixed. Add flour and baking soda. Continue beating, scraping bowl often, until well mixed.
Refrigerate the dough for 30 minutes. Shape dough into 1-inch balls. Roll balls in 1/4 cup sugar. Place 2 inches apart onto prepared cookie sheets.
Bake for 8 to 10 minutes or until very lightly golden brown. Immediately press 1 chocolate kiss in center of each cookie. Remove from cookie sheets; cool completely on wire racks.
Adapted from Land O’ Lakes
Labels:
Macadamias,
Shaped Cookies
Friday, September 23, 2011
Frosted Apple Cinnamon Bars
I’ve been waiting to make these bars for a while! Fall has arrived these are the perfect bars for fall. Apple, cinnamon, and oats are a great combination. I love cinnamon baking chips and I stock up at the one grocery store in my area that stocks them. This recipe calls for the chips and as soon as I saw that in the recipe I set it aside and said: “I’ll make these in the fall.”
If you can’t find cinnamon chips, the original recipe suggests using the same amount of white chocolate chips and a teaspoon of cinnamon. I don’t think that would be quite the same, but I’m sure that combination would be good, too.
I messed up when making these and only put in ½ cup of butter in the cookies. I hoped with the cinnamon chips and the apple they would be ok, and they seemed to be fine. The frosting was too thick to spread so I added about a teaspoon of milk to make it easier to work with. They were a little tricky to cut, so you won’t get perfect looking squares, but that’s ok! (I admit, yes, I freak out about them not looking perfect, but it’s ok.) The flavors in these are superb!
Frosted Apple Cinnamon Bars
1-1/3 cups flour
1 teaspoon salt
¾ teaspoon baking soda
1-1/2 cups oats
¾ cup butter, at room temperature
¾ cup firmly packed brown sugar
½ cup sugar
2 eggs
1 teaspoon vanilla
10 oz. cinnamon baking chips
1 cup chopped apple
3 cups powdered sugar
¼ cup butter, at room temperature
3 oz. cream cheese, at room temperature
1 teaspoon vanilla
Milk, if required
Preheat oven to 350 degrees. Grease a 9” x 13” pan.
In a small bowl, combine the flour, salt, baking soda, and oats. In a large mixer bowl, add the butter, brown sugar, and sugar. Beat on medium until creamy. Stir in the eggs and vanilla, until combined. Reduce mixer speed to low and stir in the flour mixture. By hand, stir in the cinnamon baking chips and chopped apple.
Spread the dough into the prepared pan. Bake for 33-38 minutes, until a toothpick inserted in the center comes out clean. Cool completely before frosting.
Make the frosting: in a large mixer bowl, combine the powdered sugar, butter, cream cheese, and vanilla. Beat until smooth. If the frosting is too thick, add milk until the frosting is the desired consistency. Frost the cooled cookies and then cut into bars.
Recipe from Land O’ Lakes
Labels:
Apples,
Bar Cookies
Tuesday, September 20, 2011
Salt and Pepper Cocoa Shortbread
This week’s Tuesdays with Dorie recipe was selected by Tia of Buttercream Barbie. She chose Salt and Pepper Cocoa Shortbread. This is an unusual shortbread in that you roll the dough into a log and make them into slice-and-bake cookies. The shortbread also contains salt and pepper, which may seem strange. I have made a couple of cookies that contain pepper and I like the flavor in cookies. You can get the complete recipe for these cookies on Tia’s blog, and don’t forget to check out all of the other Tuesdays with Dorie bloggers and their interpretation of this week’s recipe.
I was happy that this was a slice-and-bake cookie, as those don’t seem to take too much time. I didn’t change the recipe much at all. I did use dark cocoa powder, which gave the cookies a deep, rich color. For the salt, I used Hawaiian Pink Diamond Sea Salt. My husband and I just returned from Hawaii and we picked up a couple of different types of salt. (We also bought lots of macadamia nuts: those recipes are on their way!) This particular salt contains Hawaiian Alaea volcanic clay, which gives it a beautiful pink color. It doesn’t taste that different, at least to me, but it sure looks great!
These cookies came together so quickly, but they were a little hard to shape into logs. The dough is sticky and gets all over your hands, the kitchen counter, etc. I rolled mine on a Silpat and that worked ok. I topped some of the cookie with extra salt and I wish I would have done that will all of them as that added a lot. The texture of these cookies is excellent; they just melt in your mouth. I liked the salt and pepper in these, and I think they would be good with cinnamon and some other spices. These were unusual and very good!
Recipe from Baking from My Home to Yours by Dorie Greenspan, on page 128
Labels:
Refrigerator Cookies,
Tuesdays with Dorie
Monday, September 19, 2011
Tropical Muffins
For a couple of years now, every Friday at work I have brought cookies to share with my colleagues. One of my coworkers told me that she so looked forward to the treats on Friday that she wanted to bring some of that energy to work on other days. She started bringing breakfast treats on Mondays as a positive “Thank goodness it’s Monday” way to start the week. This friend at work retired at the end of last year, so I thought it would be nice to continue the tradition.
Tomorrow is the first day of fall quarter at the library, and fall quarter is always really hectic. Lots of new students who don’t know where anything is or what they are supposed to do! I enjoy helping out new students, helping them find their way, but it’s hard to be super cheerful when you are answering the same question for the 20th time. But my job is to help them out, in whatever way they need. Here’s to a good first day!
I recently returned from a fabulous trip to Hawaii, and these muffins reminded me of some of the great fruits that I had while I was there. This is a fairly simple muffin recipe that allows you to use any sort of jam or preserves that you have on hand. I used apricot pineapple preserves and also added a little coconut to the batter. To add a little extra sweetness for Monday, I decided to glaze the muffins with pineapple glaze: just powdered sugar and pineapple juice. You could make the glaze with milk or omit it all together, but I figured I’d need an extra boost helping out all the new students.
Tropical Muffins
2 cups flour
3 teaspoons baking powder
1/2 teaspoon salt
1/2 cup sugar
1 egg, beaten
3/4 cup milk
1/4 cup vegetable oil
1 cup any apricot pineapple preserves
½ cup shredded coconut
1-1/2 cups powdered sugar
About 4 tablespoons pineapple juice
Preheat oven to 400 degrees. Spray 18 muffin tins with nonstick cooking spray.
In a large bowl, stir together the flour, baking powder, salt and sugar. Make a well in the center. In a small bowl beat egg, milk and oil together. Pour all at once into the well in the flour mixture. Mix quickly and lightly until moistened. The batter will be lumpy. Gently stir in the preserves and the coconut.
Fill the muffin pans ¾ full. Bake for 20-25 minutes or until golden. Allow to cool 5 minutes in the muffin tins and then remove to a wire rack to cool completely. Glaze once cooled.
Make the glaze: in a small bowl combine the powdered sugar and pineapple juice until of a drizzling consistency. Drizzle over cooled muffins.
Recipe adapted from All Recipes
Friday, September 16, 2011
Peanut Butter and Jammy Bit Cookies
I often fall in love with ingredients sold through the King Arthur Flour catalog and I recently was so enamored with one of their recipes that I placed an order right away. (That post will come later.) Plus I was out of vanilla so it was time to restock! I’d had my eye on these jammy bits for a while and I was glad I remembered to order them when I got the other items.
These bits are exactly as described: they taste like little bits of jam. They taste pretty good just on their own! I figured that they would be perfect in peanut butter cookies, because who doesn’t like peanut butter and jam? I wanted to find a puffy cookie, but these didn’t turn out to be puffy in the end. I adapted a recipe that called for 1-1/2 cups of chocolate chips and I only used about ½ cup of the jammy bits, so that may be part of the difference. They turned out to be these perfectly round, flat cookies with bursts of fruit flavor, so while different than expected they are really great. I’m not a cookie dough eater, but my husband said that the jammy bits have an even more robust flavor after baking. These were really fun to use in cookies.
Peanut Butter and Jammy Bit Cookies
½ cup butter
6 tablespoons peanut butter
2 cups flour
1/2 teaspoon baking soda
¼ teaspoon salt
1 cup brown sugar
1/2 cup sugar
1 egg + 1 egg yolk, at room temperature
2 teaspoons vanilla
½ cup jammy bits (or chocolate chips)
Preheat oven to 325 degrees . Line two baking sheets with silicone baking mats.
In a microwaveable bowl, combine butter and peanut butter. Heat in 30 second increments until melted. Let cool completely. In a small bowl, combine flour, baking soda, and salt; set aside.
In a large mixer bowl, mix the cooled butter/peanut butter and sugars until combined. Add the egg, egg yolk, and vanilla and stir until mixed. Gradually add flour and mix until combined. If the dough is crumbly, add 1-2 teaspoons of milk. Fold in jammy bits.
Shape the dough into 1-inch balls. Bake for 10-12 minutes, until slightly brown. They will still look soft in the middle. Allow to cool slightly before removing to a wire rack to cool completely.
Adapted from How Sweet It Is
Labels:
Cookies
Tuesday, September 13, 2011
Classic Brownies
This week’s Tuesdays with Dorie recipe was picked by Anne of Anne Strawberry. She chose Classic Brownies, and how can you go wrong with brownies? There are many brownie recipes in Baking from My Home to Yours, and Dorie describes this one as “not gooey, intensely chocolaty, dry on top and melty in the middle…” You can get the recipe for these brownies on Anne’s blog and also make sure you check out the links for the posts by the Tuesdays with Dorie bakers. While this is a classic, I’m sure that there will be some really interesting variations for this one!
This brownie is heavy on the chocolate (unsweetened and bittersweet chocolate) and light on the butter. On an unrelated note, in making this recipe I discovered that I can no longer get my favorite baking chocolate at Trader Joe’s. I used to buy these wonderful easy-to-melt chocolate callets (disks) there but they no longer carry them. I found an ok substitute at Whole Foods, but they cost more. Baking can be expensive and I’m always happy to find good ingredients at a good price. I still love Trader Joe’s though!
These saucepan (or top of the double boiler) brownie were fun to make. I thought about mixing it up a bit with the nuts I included. Maybe hazelnuts? I also had candied hazelnuts on hand, but I went with toasted pecans. Since these are supposed to be classic I didn’t want to change it too much. I baked mine for the longer range of time, and I could tell that the edges were done and the center was still soft. This was even more obvious as they cooled and the center remained dark brown and the edges were lighter. Mine are quite fudgy, almost gooey, but they are very chocolaty. I wanted them to be a tiny bit sweeter, but I can live with the super chocolate. Pair these with ice cream for a brownie sundae and you’d be in heaven.
Recipe from Baking from My Home to Yours by Dorie Greenspan, page 88
Labels:
Bar Cookies,
Tuesdays with Dorie
Monday, September 12, 2011
Inside-Out Black Forest Cake
I made this cake for a party at work and it is made for a special occasion. If you like Black Forest Cake, this is just slightly different. I changed it from the original recipe, partially because I didn’t have the correct pans, and partially because it felt “done” at the point I was! The original recipe calls for three 8-inch pans, but I simplified and just used two 9-inch pans. It made assembling the cake easier. You are also supposed to spread the top with chocolate ganache. It seemed decadent enough without the ganache. People enjoyed it whole-heartedly without the extra chocolate.
I soaked the cherries in the kirsch mixture, so they were particularly tipsy. Tipsy cherries are great for adults, but I served this at a party with students and some of the students didn’t care for them. This is a very rich cake and you’ll want to cut the pieces small. A little kirsch goes a long way, and if you want to avoid the alcohol all together, you could simply use more of the cherry liquid and omit the kirsch. This is a fun cake and worthy of a great celebration!
Inside-Out Black Forest Cake
2 eggs plus 2 yolks
¾ cup sugar
6 tablespoons cornstarch
2 cups milk
3 tablespoons butter, cut into pieces
1-1/2 teaspoons vanilla
2-1/2 cups plus 2 tablespoons flour
1 cup plus 2 tablespoons cocoa powder
2 teaspoons baking soda
1/8 teaspoon salt
1 cup plus 2 tablespoons butter, softened
1 cup sugar
1 cup brown sugar, packed
3 eggs, room temperature
¾ cup sour cream
1-1/2 cups buttermilk
30-40 canned or jarred cherries (reserve ¼ cup plus 2 tablespoons liquid)
¼ cup kirsch
Make the pastry cream: In a large mixer bowl, whisk eggs, yolks, and ½ cup sugar on medium high. Stir in cornstarch; whisk on medium low until combined.
Bring milk and remaining ¼ cup sugar to a boil in a medium saucepan. Whisking constantly, slowly pour half of the milk mixture into the egg mixture; whisk until smooth. Pour the mixture back into the saucepan with the remaining milk; whisk over medium heat until the mixture is thick, 2-3 minutes.
Pass the mixture through a sieve into a large bowl. Add the butter, a few pieces at a time, stirring until melted after each addition. Set the bowl in an ice-water bath until chilled. Stir in vanilla. Cover with plastic wrap, pressing it directly on the surface of the pastry cream and refrigerate for at least 2 hours.
Preheat oven to 350 degrees. Butter two 9-inch round cake pans and line the bottom with parchment. Butter the parchment and dust with flour.
In a small bowl, sift together the flour, cocoa powder, baking soda, and salt. In a large mixer bowl, cream the butter and granulated sugar until fluffy. Add brown sugar, beat until fluffy. Add eggs, one at a time, beating well after each addition. Mix in sour cream. Turn the mixer to low and add the flour in three batches, alternating with the buttermilk in two batches.
Divide batter between the pans and bake for 25-30 minutes. Cool the cake in the pans and remove once completely cooled.
Combine the reserved cherry juice and the kirsch. Brush the top of the cakes with the kirsch mixture. Spread half of the pastry cream on top of one layer and arrange 15 cherries on top. Top with the other cake layer and spread with the remaining pastry cream. Arrange remaining cherries on top.
Recipe from Martha Stewart Holiday Sweets
Friday, September 9, 2011
Lemon Tassies
I typically take most of my baked treats to share at work; I’ve got an eager audience there! Since I work at a college, life and work are controlled by when classes are in session and when they are not. When classes are in session, I’m a librarian. When classes are not in session, I often work as a faculty advisor to new students. I really enjoy my work as an advisor; I get to help out new students and make sure that they have a good start at the college.
We work with a number of students in advising, and I had brought cupcakes to share with the students and the other faculty advisors. One of the students lamented that she wasn’t there that day and was so sad she missed my baking. I told her I took requests and that I would make something for her. What flavors did she like? She said that she liked lemon so I started looking through my cookbooks for something lemon. Well, there are lots of lemon desserts out there, but I settled on lemon tassies, which are little lemon cream cheese pies.
I like to make different kinds of tassies, which typically have a cream cheese pastry shell and then the different filling. There are different in that the crust is sweet pastry dough and the cream cheese is in the filling. These have lots of lemon flavor and the petite little cups look so fancy. It’s very tedious to press the dough into 48 cups, but it’s worth the extra effort. I ran out of the cream cheese filling so I decided to make lemonade out of lemons and filled the extra shells with lemon curd. The lemon curd tassies and the lemon cream cheese tassies were both excellent!
Lemon Tassies
2 cups flour
10 tablespoons cold butter, cut into pieces
6 tablespoons sugar
2 egg yolks
1 teaspoon vanilla
2 teaspoons lemon zest
¼ teaspoon salt
8 ounces cream cheese, at room temperature
1/3 cup sugar
1 egg
3 tablespoons lemon zest
1 tablespoon lemon juice
½ teaspoon vanilla
Preheat the oven to 350 degrees. Spray 48 mini muffin cups with cooking spray.
Make the crust: in a food processor, process flour and butter until the consistency of crumbs. Add the sugar, egg yolks, vanilla, lemon zest and salt and process until combined. Mixture will be crumbly; do not over process.
Divide dough into 4 pieces and then divide each part into 12 pieces. Place one piece of dough in each muffin cup. Press the dough into the bottom and up the sides of the cups. Set the muffin pans on a baking sheet.
Bake for 18-20 minutes until lightly browned, rotating the pans around half way through the baking time. If the dough has puffed, press down with a spoon. Allow to cool for about 15 minutes before filling. (Keep the oven on.)
Make the filling: in a large mixer bowl, beat the cream cheese, sugar, egg, lemon zest, lemon juice and vanilla until smooth. Using a small cookie scoop, fill each cup with the cream cheese mixture. Bake for 10-12 minutes until the filling is set. Cool completely on wire racks. Refrigerate once completely cool.
Recipe from Martha Stewart Cookies
Labels:
Lemon,
Shaped Cookies,
Tassies
Tuesday, September 6, 2011
Chocolate Spice Quickies
This week’s Tuesdays with Dorie recipe was picked by Jessica of My Baking Heart. She chose Chocolate Spice Quickies, which were very different than I envisioned after reading the recipe title. I figured that they would be a cookie that you mix and bake in a matter of minutes. Not so! They are a refrigerator cookie where you make the dough in the food processor and then shape into logs. Once they’ve been in the refrigerator for a couple hours, you can slice and bake them up in no time. So they are quick if you plan ahead. You can get the recipe for these quick-in-some-ways cookies on Jessica’s blog.
I like refrigerator cookies, since you can make the dough ahead and bake them up when you have time. In my case, I baked a lot of things at once before heading on vacation. It was warm in the house at the time so I was thankful that I could make these one evening and then bake them in the morning before the house got too warm. My logs weren’t perfect circles, but I was ok with that. I had thought about rolling the logs in chocolate sprinkles or something like that to jazz them up, but I ended up following the original recipe exactly: no adornments.
These little cookies are speckled with the ground almonds, which makes them look interesting. I didn’t taste the spice all that much, but my husband picked up on that flavor right away. I think I would call these cocoa almond quickies. While they contain melted chocolate, I thought the flavor was more reminiscent of cocoa. I like these cookies, but they aren’t showstoppers. The chocolate and almond flavors are nice and the spice is a very slight accent. Perfect for afternoon tea.
Recipe from Baking from My Home to Yours by Dorie Greenspan, page 140
Labels:
Refrigerator Cookies,
Tuesdays with Dorie
Monday, September 5, 2011
Cherry Butter Pound Cake
I’ve had this recipe bookmarked for a while, in fact, longer than I have had the cherry butter on hand! This recipe showcases fruit butter, which is kind of like a spiced preserves. Fruit butter is made by cooking down fruit and then adding sugar (and usually spices). Apple butter is most common, and is what the original recipe specified. When I was in Philadelphia this spring, I noticed that the Amish vendors were selling a variety of fruit butters. I bought apple, cherry, pear, and plum butter.
I’ve not used cherry butter before, but I figured it would be great in pound cake. Apple butter is a beautiful golden brown, but the cherry butter is a lot darker. When I added the butter to the batter, it looked really dark, almost like there was chopped chocolate in the batter. Interesting! I didn’t have mini loaf pans, so I baked this in a pan with small squares. Each opening about half the size of a muffin, and I made a total of 12 squares. I wasn’t sure how long to bake them, so I started and 20 minutes and went from there. I ended up baking them for 25 minutes; your baking time will vary a lot based on the pan you use.
These didn’t rise very much, and after I checked them at 20 minutes, I wondered if I had messed up and not included any leavening. I double-checked the recipe and it doesn’t call for a leavening agent other than eggs and highly whipped butter. The cherry flavor of these is incredible, and they are quite good on their own. If you want to jazz it up a bit, top with caramel or chocolate sauce.
Cherry Butter Pound Cake
7 ounces flour
1/4 teaspoon salt
1/c cup butter, softened
2/3 cup sugar
1/2 teaspoon vanilla
1/2 cup cherry butter (or other flavor)
3 eggs, room temperature
Preheat oven to 330 degrees. Grease two mini loaf pans, a dozen muffin cups or a pan with small squares.
In a small bowl, sift together the flour and salt. Set aside. In a large mixer bowl, cream butter and sugar for a full 8 minutes. It should be very light in color and fluffy. Beat in vanilla and cherry butter until thoroughly combined. Add eggs one at a time, beating for a full minutes after each addition. Add flour mixture to butter mixture in 4 increments, beating only until just combined after each addition.
Spoon batter into prepared pans, smoothing the top with a spatula. Baking time varies a lot depending on the pan you use. Baked mini loaves for 40-50 minutes, muffin cups for about 30 minutes and small squares for 25 minutes. To be sure, cake is done when a toothpick inserted in the center comes out clean. Allow to cool for about 10 minutes before removing from the pan to cool completely.
Recipe from Our Share of the Harvest
Labels:
Cakes
Friday, September 2, 2011
Oreo Pudding Cookies
One of the blogs I follow recently had a guest post from her husband. In that post, the husband wrote about a normal conversation that they have in planning dinner. She asks what he wants, and he complains that she always wants to try something new since that is more interesting for the blog. I read that blog entry to my husband and he was laughing so hard. I will often ask my husband what cookies I should bake. He always wants chocolate chip cookies and I always want something more unusual.
I came across this recipe and I felt like I had found the best of both worlds: very similar to chocolate chip cookies (much to my husband’s liking) yet something more unusual. Cookies and cream sounding like a great combination to stick in a chocolate chip cookie. I’ve seen a number of different cookies and cream combinations floating around the blog world, but this is the first one that really hit the mark for me. They use Oreo instant pudding mix, which I didn’t even know existed. I’ve seen pudding mixes used in cakes and cookies before and I know that it makes for a nice, soft cookie. It also uses white chocolate bars with chocolate cookie bits. (Hopefully those won’t disappear from the stores. I used to make a cookie with white chocolate bars with almonds, but they don’t make them anymore!)
I really liked these, as the flavors were really interesting. I used a mix of milk and semi-sweet chocolate chips. Sometimes you’d get the sweet bite of the milk chocolate and other times the slightly bitter semi-sweet chocolate. The pudding mix adds a bit of creaminess to the dough. These cookies are soft but the firm up after sitting overnight. They don’t brown while baking so don’t expect that to happen. If you brown these, they will be horribly dry and over baked. My husband gave these a thumbs up, so if you are looking for an interesting variation of a chocolate chip cookie, give these a try.
Oreo Pudding Cookies
2 1/4 cups flour
1 teaspoon baking soda
1/4 teaspoon salt
1 cup butter, room temperature
3/4 cup brown sugar
1/4 cup sugar
1 4.2 ounce package instant Oreo Pudding mix
2 eggs
1 teaspoon vanilla
2 2.6 ounce Hershey's Cookies N Cream Candy Bars, chopped
2 cups milk or semi-sweet chocolate chips
Preheat oven to 350 degrees. Line two baking sheets with silicone baking mats.
In a small bowl, combine the flour, baking soda, and salt. In a larger mixer bowl, cream together the butter and sugars. Beat in pudding mix until blended. Add the eggs and vanilla and mix well. Add the flour mixture and mix to combine. Stir in cookies n' cream pieces and chocolate chips. Batter will be thick.
Roll dough into 1-1/2” balls and place on prepared baking sheets. Bake for 8-11 minutes, until set. You do not want to over bake these; they will not be golden brown. Let cookies cool for 5 minutes on baking sheet before moving to a wire rack to cool completely.
Recipe from The Girl who Ate Everything
Labels:
Cookies
Subscribe to:
Posts (Atom)