Friday, October 28, 2011
Caramel Crumb Bars
Halloween is just around the corner and soon I am sure that I will need to figure out how to use up all that Halloween candy. We don’t typically get trick or treaters at the door, but we always buy candy just in case. I’ve noticed that there are lots of recipes floating around the web that use candy, so I’ll have to keep my eyes open.
These caramel bars seem like they might use premade caramels, but this is a different type of caramel. I’ve melted whole caramels and I’ve made caramel with sugar, butter, and cream, but this is another method. Strange, when I was browsing around the web recently I stumbled across this type of caramel, which uses sweetened condensed milk, butter, and brown sugar. Then I looked at this recipe I had planned to make and realized that it used the same method. I love caramel so I was happy to try a new recipe.
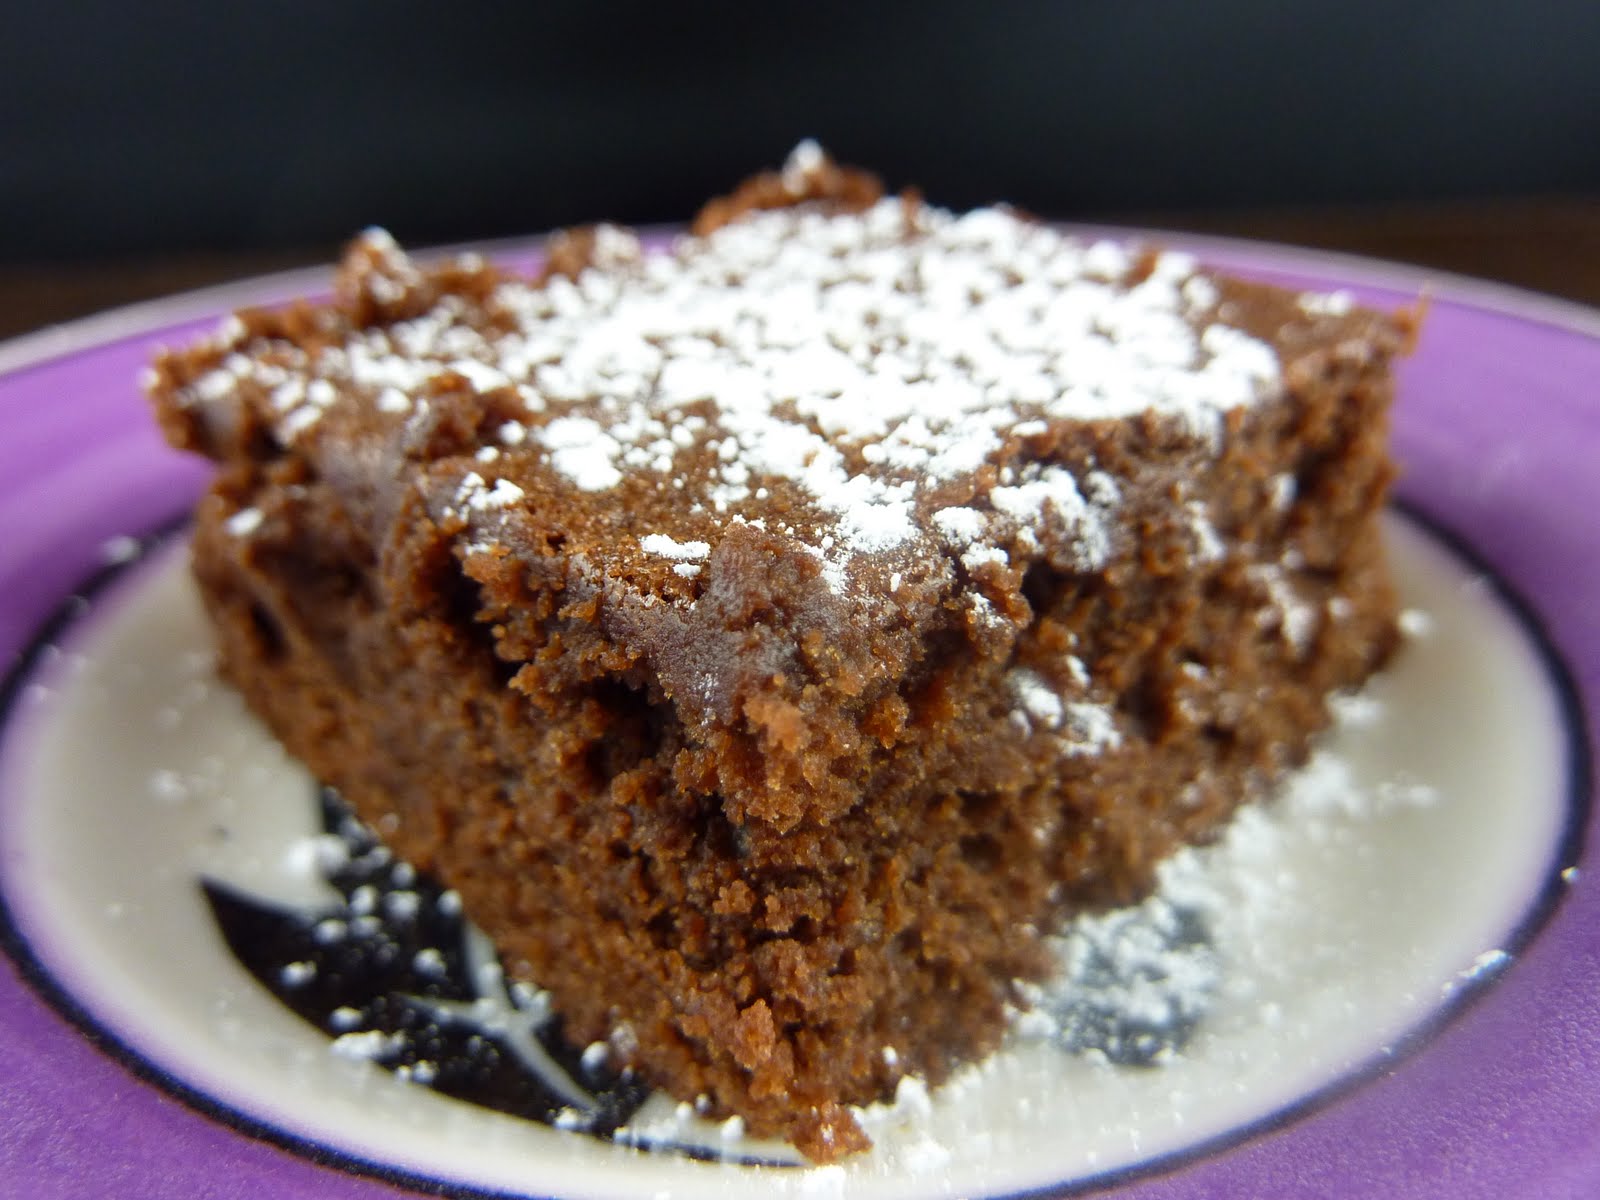
The base and topping of this bar is buttery shortbread, which paired with buttery caramel can’t be beat. Making the caramel with the sweetened condensed milk on the top of the stove worked really well. I got some overcooked caramel around the edges of my saucepan, but just avoid adding that bit to the bar cookies. These cookies are really thin, but they’re rich so that’s ok. These turned out so well and I can’t wait to try this caramel in another recipe.
Caramel Crumb Bars
2 sticks unsalted butter, at room temperature
1/2 cup sugar
1/4 teaspoon salt
2 teaspoons vanilla
2 1/2 cups flour, divided
4 tablespoons unsalted butter
1 tablespoon light corn syrup
1/4 cup packed dark brown sugar
1 14-oz can sweetened condensed milk
Preheat oven to 350 degrees. Spray a 9x13-inch pan with cooking spray, then line the pan with aluminum foil, leaving an overhang, and spray again with cooking spray.
In a large mixer bowl, beat the butter, sugar, and salt on medium speed until soft and light, about 2-3 minutes. Stir in the vanilla. With the mixer on low, add 2 1/4 cups of the flour, beating just until the dough is smooth and the flour has been absorbed. Scrape the sides of the bowl as necessary.
Transfer 3/4 of the dough into the prepared pan. Press the dough evenly into the pan to form a bottom layer. Refrigerate while you make the filling and the top layer.
Add the remaining 1/4 cup of flour to the remaining dough. Work it in with your fingers until large crumbs form. Set aside.
Make the filling: in a medium saucepan, combine the butter, corn syrup, brown sugar and condensed milk. Bring to a simmer, whisking occasionally. When the mixture begins to boil, whisk frequently until it begins to thicken and darkens in color slightly, about 10 minutes. Remove from the heat and let cool for about 10 minutes.
Remove the pan from the fridge and spread the filling evenly over the bottom crust. Crumble the topping evenly over the caramel.
Bake for about 30 minutes or until the filling is gently bubbling and has turned a dark caramel color. Cool the bars in the pan on a wire rack until lukewarm, about 15-20 minutes. Use the foil to lift bars out of the pan. Cool completely before cutting into squares.
Recipe from Eats Well with Others
Tuesday, October 25, 2011
A Fig Cake for Fall
This week’s Tuesdays with Dorie recipe was picked by Ursula of Cookie Rookie. She chose A Fig Cake for Fall. This cake is a cornmeal/honey cake topped with honey and port poached figs. You can get the complete recipe on Ursula’s blog and you can also check out how all of the other bloggers handled this week’s recipe by visiting the Tuesdays with Dorie site. I don’t think that everyone could find figs this week, so there will probably be a lot of variations.
Ok, I have to admit, I was apprehensive about this one because I’ve never worked with fresh figs. Could I even find them at the store? I did find them at the store, in fact, I found two types: some green ones and some black ones. I’m sure they have specific names but I don’t know what they are! So this cake used two types of fresh figs. I had bought mine when I first saw them and didn’t make the cake for a bit and mine were VERY ripe when I finally made the cake.
You poach the figs in honey and port, which just smelled amazing. We love port in our household, so I knew that would be good. I love that the cake has the cornmeal balanced with the sweetness of honey. I thought this would take a long time, but it didn’t. Any when it came out of the oven it looked exactly like the photo in the book. How exciting! So while I was initially a bit afraid of this recipe, it turned out really well and I have to say that I have conquered my fear of figs!
Recipe from Baking from My Home to Yours by Dorie Greenspan, page 198
Monday, October 24, 2011
Pumpkin Cake with Browned Butter Icing and Candied Pecans
When I found this cake, I was on a mission: I had about 1 cup of pumpkin puree left in the fridge and I needed to use it up. Most recipes call for a can of pumpkin, which is about 2 cups, and I didn’t really want to go to the store and buy some more. I went looking through my Pinterest links and on Tastespotting and Food Gawker and I came across this recipe. It was perfect. It called for 1 cup of pumpkin and I had all of the other ingredients on hand.
I think I have said this before that I am not the biggest fan of pumpkin, but I do like the spices that are usually paired with pumpkin. I not such a big fan of the soft texture either, but in a cake you don’t have that quite as much. I was interested in the browned butter icing and it had been a little while since I’d melted sugar to caramelize something. Ok, I probably shouldn’t have started this cake at 8:45 pm, but when you want to bake, you want to bake!
While this cake looks fancy in its final presentation, none of the steps are very hard. The cake mixes in one bowl and I got it ready and then had to wait for the oven to reach full temperature. Making the candied pecans was a bit tricky, or maybe I was tired. You do get little sugar strings on everything in your kitchen within a three-foot radius, so that’s a bit annoying. Once the pecans cool a bit you can break off all of the extra stringy bits. The browned butter is interesting; it’s a fine line between browned and burnt butter, but I think I was ok. The frosting had an interesting, nutty flavor. Altogether, this cake mixes many interesting flavors and looks impressive for a modest amount of work.
Pumpkin Cake with Browned Butter Icing and Candied Pecans
1 2/3 cups flour
1 teaspoon cinnamon
1/4 teaspoon nutmeg
1/4 teaspoon allspice
1/2 teaspoon salt
1/2 teaspoon baking powder
1/2 teaspoon baking soda
8 tablespoons butter, room temperature
1 1/2 cups sugar
2 large eggs
1 cup pumpkin puree
1/2 cup warm milk
4 tablespoons unsalted butter
1 cup sifted confectioner’s sugar
1 teaspoon pure vanilla extract
1 to 2 tablespoons milk
1/2 cup sugar
10 well-shaped, large pecan halves
Heat the oven to 350 degrees. Butter a 9-inch round cake pan and coat pan with flour.
In a medium bowl, combine the flour, cinnamon, nutmeg, allspice, salt, baking powder, and baking soda; set aside.
In a large mixer bowl, beat sugar and butter together until light and fluffy, about 2 minutes. Add eggs, and beat until combined. Add pumpkin puree and milk; beat until combined. Add reserved flour mixture; beat on low speed until just combined. The mixture may look a bit curdled, it’s ok.
Pour batter into prepared pan, and bake until a cake tester inserted into the middle comes out clean, about 55 minutes. Transfer the cake to a wire rack to cool. Let cake rest 20 minutes.
In a small skillet, melt sugar over medium-high heat until medium golden, about 3 minutes. Remove skillet from heat. Working quickly, drop the pecan halves, a few at a time, into the melted sugar. Using a fork, turn nuts until they are evenly coated. Transfer the candied nuts to a wire rack to cool completely. (If the sugar hardens, return skillet to low heat, and stir several minutes)
In a small saucepan, melt butter over medium-high heat until nut-brown in color. Remove pan from heat, and pour butter into a bowl, leaving any burned sediment behind.
Add sugar, vanilla, and 1 tablespoon milk; stir until smooth. If the icing is too thick, add the remaining tablespoon milk, a little at a time, until consistency is spreadable. Let cool 5 minutes.
Unmold and cake and place on a serving dish. Spread icing over top of cake and decorate with candied pecan halves.
Recipe from Bread and Roses
Friday, October 21, 2011
Pecan Caramel Crispies
So what do you do with that last bit of cereal left in the cupboard? I occasionally by Rice Krispies for use in some sort of recipe, but I never end up using the entire box. I don’t really like to eat them just as normal cereal, so usually they sit in the cupboard and I eventually throw them away because they are stale.(I know, I could make Rice Krispie Treats, but I never do!) I was cleaning the other day and noticed I had about ¼ a box left. They weren’t stale, so I vowed to use them up.
I realized that I have had this recipe bookmarked since June, and I figured it would all but use up the remaining cereal I had on hand. Since I also had some other baking to do that day, I was thankful that they were a quick, stir together and bake cookie. They are quite interesting, with caramel, toasted pecans, and the crispy rice cereal. I usually expect brown sugar in a cookie that has those flavors, but this uses powdered sugar instead. Boy, even the dough smelled great!
I baked these for the longer time and I have to warn you, they still look under baked when you take them out of the oven. The cereal will be beginning to brown on the cookies and they firm up as they cool, so don’t worry. Since you get the crispy rice cereal both in the dough and on the outside of the cookie, you notice them more than you do in other cookies that have crispy rice cereal in the dough. These are really great, and now I just need to figure out recipes to use up all the other odds and ends in the cupboard.
Pecan Caramel Crispies
1 cup butter, room temperature
1 cup powdered sugar
1 egg yolk
1 teaspoon vanilla
1/2 teaspoon salt
1 1/2 cups flour
1 cup chopped pecans, toasted
1 cup crispy rice cereal, plus more for rolling cookies
1/2 cup caramel sauce, warm (optional)
Preheat oven to 350 degrees. Line two baking sheets silicone baking mats.
In a large mixer bowl, cream butter and powdered sugar. Add egg yolk, vanilla, and salt; mix well. Gradually add flour; mix just until combined.
Add the pecans and stir with a spatula until combined. Carefully stir in 1 cup of crispy rice cereal.
Shape the dough into 1-inch balls and roll them in additional crispy rice cereal. Place on prepared cookie sheet spacing them 1-2 inches apart.
Bake for 10-13 minutes, or until light and golden brown. Do not over bake. Allow cookies to cool 5 minutes before removing to a wire rack to cool completely.
If desired, drizzle the cooled cookies with caramel sauce. Allow the caramel to cool before serving.
Recipe from Daydreamer Desserts
Thursday, October 20, 2011
Creamy Cabbage Soup with Gruyere
So this is a first for Cookies on Friday. I normally only post baked things but I’ve been participating in my online chat list’s recipe swap and the theme for this swap was soup. I love soup so I wanted to participate. So here it is: the first non-baked thing on this blog. I submitted a sausage tortellini soup and the recipe I got for the swap was this cabbage and Gruyere soup from Mary Ellen over at Mary Ellen’s Cooking Creations.
At first glance, you’d think that this was a horribly fattening soup, but when you look at the recipe (as written) it isn’t too bad. I like cabbage and potatoes in soup. I also have leftover cabbage so I can use it in another soup that I like to make, borscht. This was fairly quick to put together. The only unusual ingredient is the use of a Parmesan rind. You use it like you would a bay leaf: add it in while the soup is simmering and take it out before serving. I was going to leave it out but I was at Whole Foods and they had small containers of Parmesan rinds for sale so I picked one up.
I made the recipe as written with low-fat milk, and I think this made for a too-thin soup. Mary Ellen had used cream and I think that would have been a lot better. Mine soup was quite thin. I thought the Gruyere would thicken it up some but it didn’t really. I think I might also add less broth, so that overall it was thicker. The flavors of the soup were good, so I think this could be excellent with just a few small changes.
Creamy Cabbage Soup with Gruyere
1 tablespoon olive oil
1 onion, chopped
1 potato, peeled and grated
1/2 medium head of cabbage, cored and grated
Salt
Pepper
5 cups chicken stock
1 Parmesan rind
2 cups milk (or half and half, cream)
1 cup grated Gruyere cheese
In a large soup pot, heat the oil over medium heat. Add the onion and cook until tender, about 5 minutes. Add the potato, cabbage, and 1/2 teaspoon salt. Stir together for a minute, taking care that the potatoes don't stick to the pot.
Add the stock, Parmesan rind, and salt/pepper to taste. Bring to a simmer, then cover and simmer over low heat for 30 minutes, until the vegetables are tender.
Add the milk to the soup. Stir to combine well and heat through without boiling. Add the Gruyere, a handful at a time, to the soup and continue to stir until the cheese has melted. Taste, adjust seasonings. Remove the Parmesan rind.
Recipe from Mary Ellen’s Cooking Creations
Tuesday, October 18, 2011
Ginger Jazzed Brownies
This week’s Tuesdays with Dorie recipe was selected by Hindy of Bubie’s Little Baker. She chose Ginger Jazzed Brownies. These are simple looking brownies that have an intense ginger flavor due to ground ginger and ginger root. I love ginger and I was really excited when I read that these had been picked. You can get the complete recipe on Hindy’s blog and don’t forget to check out the Tuesdays with Dorie site to see how the bakers fared with this week’s recipe.
I followed this recipe with just one change. I used Golden Syrup rather than corn syrup because I was out. I find it strange that I have British ingredients such as Golden Syrup and Bird’s Custard Powder on hand but I run out of such a classic American ingredient. Golden Syrup worked wonderfully and I think I like it more than corn syrup anyway. (I should research how they are different; I am a librarian after all!)
When these come out of the oven, they look like classic, deep, dark brownie. They are as easy to put together as a one bowl brownie, but somehow you mess up lots of dishes: a mixer bowl, a bowl for the flour, a bowl to melt the chocolate in, and a bowl for the sugar/ginger root mixture. Despite all the dishes, they are really easy to make. I baked mine for the longer range of time and they are still quite fudgy. The ginger flavor is very intense, which is just fine by me!
Recipe from Baking from My Home to Yours by Dorie Greenspan, page 101
Monday, October 17, 2011
Pumpkin Coffee Cake
Pumpkin is not my favorite fall flavor; give me spice or ginger or apple any day! Many people like pumpkin so much that the web in inundated with pumpkin recipes this time of the year. I guess I am highly suggestive as I mark those and think, “Wow, I can’t wait to make this pumpkin thing.” I find that to be a bit strange, but I have to say that I’m learning to enjoy pumpkin a lot more than I used to. I love the spices used with pumpkin so it’s not all bad.
I had pumpkin left over from the pumpkin bread pudding that I made because I had bought the only can I could find at the store, and it was pretty big. I see canned pumpkin everywhere I go now so I must have been looking too early! I found this coffee cake and the picture looked divine and planned to make it ASAP. The original recipe was to be baked in a tube pan (which I can’t find mine! Did I give it away in a moment of clutter-cleaning haste?) but I liked the look of the round cake. I didn’t want two cakes so I baked it in a 10” springform pan. I figured it would work ok.
Well, not so much! This cake is quite soft, probably because it contains so much pumpkin, and it needs the structure of a tube pan or a smaller round pan for it to bake properly. My cake looked beautiful coming out of the oven, tested done, but when I took it out of the pan it sank terribly. It’s lovely around the edges and the streusel is delicious. Luckily, the cake is big enough that you can get salvageable pieces cut from around the edge. So not all experiments work out and look great, but this tastes really good and I’m sure it would be successful if made in the correct pan.
Pumpkin Coffee Cake
1/2 cup butter, softened
1 1/2 cups sugar
15 ounce can pumpkin puree
3 large eggs
2 1/2 cups flour
2 teaspoons baking powder
1 tablespoon cinnamon
1 1/2 teaspoons ground ginger
1/2 teaspoon ground nutmeg
1/4 teaspoon ground cloves
1/2 teaspoon salt
1/2 cup flour
1/2 cup sugar
1/2 cup light brown sugar, packed
1 teaspoon cinnamon
4 tablespoons butter, melted
2/3 cup pecans, chopped
Preheat the oven to 350 degrees. Spray the inside of a tube pan with nonstick spray; set aside. Or grease two 8” round pans.
In a large mixer bowl, beat the butter and sugar on medium speed until well blended. Add the pumpkin and eggs and mix thoroughly. In a medium bowl, combine the flour, baking powder, cinnamon, ginger, nutmeg, cloves and salt. Add the flour mixture to the pumpkin mixture. Mix on medium speed until combined. Pour the batter into the prepared pan.
Prepare the streusel topping: In a small bowl combine the flour, sugars, cinnamon, melted butter and pecans. Sprinkle the streusel over the cake batter. Bake the tube pan for 50-55 minutes or until a toothpick comes out clean. Bake the 8” pans for about 35 minutes. Cool on a wire rack for about 15 minutes. Slide a knife around the pan so the cake doesn't stick when removing it. Invert the cake onto a plate. Then invert the cake onto another plate, so that the streusel is on the top. Cool completely.
Recipe from Not So Humble Pie
Friday, October 14, 2011
Oatmeal Butterscotch Bars
This past summer, my husband and I traveled to Michigan for a family reunion. I hadn’t been to Michigan before (nor had I met that side of my husband’s family) so I didn’t quite know what to expect. The reunion was in a small town, so we were challenged to find a nice place to stay. My husband found a great bed and breakfast that was close by and was on a working cattle ranch. How interesting! We ended up having a great time there and enjoyed our visit very much.
One of the surprises of where we stayed was that it was in the middle of an Amish community. I knew that there were Amish who lived outside of Pennsylvania, but I hadn’t really thought about it too much. The B&B hosts said that there were some Amish stores that were interesting to visit, so we did that one morning. It’s a little strange pulling into a parking lot where there are as many horse-drawn buggies in the lot as cars! We looked at two stores: a hardware store and a grocery store. My husband bought the nicest leather belt at the hardware store and I bought mini butterscotch chips at the grocery store.
Well, I bought the chips in the summer and they were in the car most of the day, so the chips kind of all melted together. No worries; I figured I would be able to find recipes where you melt the butterscotch chips. This recipe fits the bill: a simple oat/butterscotch base topped with butterscotch glaze. The original recipe said to bake the bake 16-18 minutes but I baked mine closer to 30 minutes so make sure it was done. The glaze is tasty but there’s not enough of it so I would double the glaze next time. These bars don’t look fancy, but they taste SO good. If you like butterscotch, these are for you.
Oatmeal Butterscotch Bars
1 1/4 cups flour
2 cups oatmeal
1/2 teaspoon baking soda
1/2 teaspoon salt
3/4 cup butterscotch chips
16 tablespoons butter
1 cup packed brown sugar
1 egg
2 teaspoons vanilla
1/4 cup butterscotch chips
2 tablespoons brown sugar
1 tablespoon water
1/8 teaspoon salt
Preheat the oven to 350 degrees. Line a 9” x 13” baking pan with aluminum foil, letting the foil hang over the sides of the pan, and spray the foil with cooking spray.
In a medium bowl, combine the flour, oats, baking soda, and salt. Place the 3/4 cup butterscotch chips in a large bowl. In a small saucepan, melt the butter over medium heat and let the butter cook until golden brown in color, about 10 minutes, taking care not to burn. Pour the hot butter over the butterscotch chips and whisk together until melted and smooth. Whisk in the brown sugar until combined. Whisk in the egg and vanilla. Switch to a spatula and stir in the flour mixture, just until incorporated.
Spread in the prepared pan and smooth the top, spreading the batter evenly to the edges. Bake the bars until a toothpick inserted into the center comes out with just a few moist crumbs, 20-30 minutes.
As soon as the pars come out of the oven, make the glaze. Place the 1/4 cup butterscotch chips, brown sugar, water and salt in a small microwave-safe bowl. Microwave the mixture until melted and smooth, about 2 minutes on 50% power. Whisk to combine well.
Drizzle the butterscotch glaze over the bars. Cool completely before cutting into bars.
Recipe from Mel’s Kitchen Cafe
Tuesday, October 11, 2011
Basic Biscuits
This week’s Tuesdays with Dorie recipe was picked by Jennifer of Cooking for Comfort. She chose Basic Biscuits, which are a classic flour, butter, milk (or buttermilk) biscuit. You can get the recipe on Jennifer’s blog and don’t forget to check out the Tuesdays with Dorie site to check out all the variations of this week’s recipe. I can imagine that you could change this one up in a quite a few ways!
I could have sworn that we already made basic biscuits for Tuesdays with Dorie, but we’d made cream biscuits which are just a bit different. These are very simple and Dorie says the trick to light flaky biscuits is to not handle the dough very much. It’s hard to know what is too much and what is too little. I used the lightest touch possible with these and I think they turned out fairly well. You’d never call them mile-high biscuits, but that’s ok.
These are super simple to make. I was making chili for dinner one night and was able to make chili and put it on to simmer, and made the biscuits while it was simmering. I cut the recipe in half and made 5 biscuits, which was more than enough for the two of us. My biscuits were flaky and had a good buttery flavor and paired well with the chili. You do need to eat them right away, but if you made a lot you could freeze the dough before baking. Unless you are like me, and forget anything that is in the freezer! These were nice rolls for a rainy fall day.
Recipe from Baking from My Home to Yours by Dorie Greenspan, page 21
Monday, October 10, 2011
Hazelnut Dunking Biscuits
So if you’re anything like me, you’re constantly picking up items at the store “because I can use them in a recipe.” I’m really good at finding interesting ingredients, but not so good at using them up. Some things I do use up: different types of preserves, dried fruits, etc. But I admit that I do have quite a few varieties of jams that I have picked up at different places, trail mix to use up and some other ingredients that are overflowing my baking cupboards. These cookies use up one of those such finds: sweet and salty hazelnuts, which are candied hazelnuts that I bought at Whole Foods. (Whole Foods is a particularly good place to find unusual items.)
I got home one night and just was feeling kind of grumpy and I felt like baking would help. I had planned to make a coffee cake but I just wasn’t feeling it and wanted something more streamlined. My husband and I had spent the day running errands and had visited the local British store so we had England on the mind. My husband found these hazelnut dunking biscuits online and I figured they’d be great for the candied hazelnuts.
The measures for this recipe have been converted, so I’m sorry if they seem a little strange. (My best investment ever was a scale that does metric measurements!) The original recipe called for one egg, but my dough was too sandy with one egg so I added a second to bring it together. I thought the nuts were just a bit bitter on their own, but my husband couldn’t taste that so maybe my taste buds are off. In the cookie, the brown sugar pairs nicely with the sweet/saltiness of the nuts. These are really just a variation of a chocolate chip cookie, but they are really quite good!
9 tablespoons butter, room temperature
10-1/2 ounces brown sugar
2 eggs
1 teaspoon vanilla
12-1/3 ounces flour
1 teaspoon baking soda
7 ounces hazelnuts, lightly crushed
Preheat the oven to 350 degrees. Line two baking sheets with silicone baking mats.
In a large mixer bowl, cream the butter and brown sugar until light and fluffy. Add the eggs and vanilla and stir until creamy.
In a small bowl, combine the flour and baking soda. Add to the butter mixture and stir on low until combined. Stir in the hazelnuts, making sure that you don’t over mix the dough.
Shape into 1 inch balls and place on the prepared baking sheets. Bake for 11-13 minutes or until lightly browned. Cool for 5 minutes on the baking sheets before removing to a wire rack to cool completely.
Recipe from The British Larder
Friday, October 7, 2011
Caramel Stuffed Apple Cider Cookies
Using spiced apple cider mix as part of cookie dough? How interesting! I also love things stuffed inside cookies, so these were winners on several fronts. I saw this recipe and I was instantly interested. I think I came across this recipe on my new addiction Pinterest. I love that I can bookmark things (with photos) and access it from any computer I am using. It’s really great. Have you discovered Pinterest?
I don’t always like to use the more processed ingredients, and this uses the instant spiced cider mix as the main flavoring. I didn’t let too many of those thoughts get in the way since the cookies are so interesting. I hadn’t had instant spiced cider in ages, but I remember having it when I was a kid. Maybe I had it at camp? I can’t really remember but it has a very distinct smell and the instant you open the spiced cider packets that aroma really hits you. These smelled great when mixing them, great when baking them and they are absolutely divine.
The caramel can be a bit tricky, so make sure you let the cookies cool quite a bit before attempting to remove them from the baking sheet. Rush it a bit and you’ll have a caramel mess. This makes a lot of cookies, in fact I ran out of caramels before I ran out of dough. I rolled some of the cookies in cinnamon sugar and accidentally rolled some in maple sugar/sugar mixture. The maple actually worked really well. The apple flavor is most pronounced with the sweetness of the caramel coming in also. They have a nice spice to them, which is really interesting. These cookies are so different but so very good.
Caramel Stuffed Apple Cider Cookies
3 cups flour
1 teaspoon baking soda
1/2 teaspoon baking powder
1-1/2 teaspoons cinnamon
1 cup butter, room temperature
1 cup brown sugar, firmly packed
1/2 teaspoon salt
1 Box (10 packets) Instant Spiced Apple Cider Mix
2 eggs, room temperature
1 teaspoon vanilla
14 ounce bag Kraft Caramels
Cinnamon sugar
In a small bowl, mix together flour, baking soda, baking powder and cinnamon.
In a large mixer bowl, cream together the butter, brown sugar, salt and apple cider powder. Add the eggs, one at a time followed by the vanilla and mix well. Add the flour mixture gradually to the butter mixture and stir just until combined. Refrigerate for one hour.
Preheat oven to 350. Line two baking sheets with silicone baking mats. Unwrap the caramels.
Shape 1 tablespoon of dough into a ball, flatten it a bit and place one caramel in the middle. Work the dough around the caramel so that it is encapsulated. Re-roll into a ball and roll in the cinnamon sugar.
Bake for 12-14 minutes until lightly browned. Cool the cookies on the baking sheet for about 10 minutes. As the caramel may be stuck to the silicone baking mate, twist the cookies as you remove them from the baking sheets, Allow to cool. Best served just a little bit warm.
Recipe from The Jey of Cooking
Thursday, October 6, 2011
Recipe Swap: Pumpkin Bread Pudding
I follow a cooking chat list and one of the ladies on the board organizes recipe swaps. Now, I’m kind of shy so I haven’t signed up to participate. The theme of this swap was apples/pumpkin, and I knew that it was the perfect time to start. I submit a recipe that someone else makes and I get a recipe to try. My recipe was pumpkin bread pudding, submitted by Melissa of Delicious Meliscious. She’s got some great looking things on her blog so make sure you pay her a visit! Make sure you check out A Taste of Home Cooking, the recipe swap organizer, who will post a summary of all the swap recipes.
I’m not the biggest fan of bread pudding, although I like it a lot more than I used to. My husband loves bread pudding so I think he was happy with the recipe I got. I didn’t change the recipe at all. I used milk since I had that on hand, but you could use something richer if you wanted. I had left over egg yolks so I used 4 egg yolks instead of 2 eggs plus a yolk. It turned out just fine. It’s very simple to put together, as you don’t have to cook the custard in advance. (According to my husband, this is the way he knows to make bread pudding. Good to know!) This is really great served with the toffee sauce and ice cream. Both are optional but why would you opt out of toffee and ice cream?
I really enjoyed trying something new and I’m going to participate in future recipe swaps. So for the first time I’ll be making non-baked things. I’m excited to try something different and I hope you enjoy it as I expand my horizons.
Pumpkin Bread Pudding
2 eggs, plus 1 egg yolk
3/4 cup canned pumpkin
1 1/2 cups milk (light cream, half and half)
3 tablespoons butter, melted and cooled
1/2 cup brown sugar, packed
1/2 teaspoon vanilla
1/2 teaspoon cinnamon
1/4 teaspoon ginger
1/8 teaspoon cloves
1/4 teaspoon salt
5 cups cubed day-old bread
1/2 cup raisins
1/2 cup brown sugar, packed
4 tablespoons butter, cut into pieces
1/4 cup heavy cream
1/4 teaspoon vanilla
Preheat oven to 350 degrees. Have an 8” square pan ready; do not grease the pan.
In a large bowl whisk together the eggs, pumpkin, milk, melted butter, brown sugar, vanilla, spices, and salt. Add the bread cubes and raisins and toss to coat, making sure all the bread cubes are coated with the custard.
Transfer the bread pudding mixture to the 8” pan and bake for about 25 minutes or until a toothpick inserted in the center comes out clean. Remove the bread pudding from the oven and place on a wire rack to cool slightly.
Make the toffee sauce: place the brown sugar, butter, and cream in a saucepan and bring to a boil. Boil for about 3 minutes then remove from heat and stir in the vanilla extract. The sauce can be made in advance.
Bread pudding can be served warm or cold. Serve with the toffee sauce and vanilla ice cream or whipped cream.
Recipe from Joy of Baking
Tuesday, October 4, 2011
Apple Caramel Muffin Cake
This week’s Tuesdays with Dorie recipe was picked by Katrina of Baking and Boys. She chose Apple Nut Muffin Cake, which Dorie says were supposed to be muffins, but instead the batter was put in a pan and baked as a whole. I resisted the temptation to cut the recipe in half and make smaller cakes, since that would be contrary to the intent of the recipe! You can get the recipe for this cake on Katrina’s blog and don’t forget to check out the Tuesdays with Dorie site to see all the posts about this week’s recipe.
I’ve been waiting for this recipe to be selected because I love apples and I love muffins and I figured everything rolled together would be great. The original recipe called for nuts and raisins in addition to the apples, but I decided to substitute caramel bits to make this a caramel apple creation. I’m not sure that worked as well as I’d envisioned, as the caramel bits don’t stay soft after the cake bakes and cools. Still not bad, so I was glad I tried it.
I baked my cake in an oval baking dish, which I thought was about the same size as the 8” square pan that the recipe specifies, but I think maybe my pan was too small. The cake didn’t quite bake all the way through, so it sank in the middle once it cooled. This seems to happen sometimes when you bake with apples. I also think that I had too much apple and not enough batter. Apples in Washington State are huge and I’m sure bigger than Dorie’s medium apple. While this wasn’t a complete success, the flavors were great and I’m glad I made it.
Recipe from Baking from My Home to Yours by Dorie Greenspan, page 37
Monday, October 3, 2011
Hazelnut Chewies
I haven’t posted a hazelnut/chocolate combination in a while so I figured it was high time! This cookie is reminiscent of a number of other cookies: pecan snowballs, peanut butter cookies, etc. but they really are their own cookie. This recipe uses Nutella and chopped hazelnuts in the dough, and then you roll them in additional hazelnuts and powdered sugar. Hard to go wrong with all of those flavors!
These cookies take a little more time, as the Nutella in the dough makes for a very sticky dough. You want to have plenty of time to let the dough chill to help it be a little less sticky, but any way you slice it these are a tad messy to make. They are worth the extra effort and a few extra paper towels. This also makes a lot of cookies, so feel free to cut the recipe in half if you want fewer cookies. I don’t ever really post yields on my recipes as I always feel inadequate if I don’t hit the right number. Just take my word that this makes a lot.
These cookies have a wonderful hazelnut flavor and they live up to their name of being chewy. I made these for an event where I took several types of cookies. Without fail, this is the one that people ate and then came to me and said “Those are great!” and “I can’t wait until you post the recipes for these.” That’s high praise indeed!
Hazelnut Chewies
3 cups flour
2 teaspoon baking powder
1/2 teaspoon salt
1 1/4 cups Nutella spread
½ stick butter, softened
1 1/3 cups sugar
2 eggs
1 teaspoon vanilla
1 teaspoon instant espresso powder
1/3 cup milk
1-1/2 cups hazelnuts, toasted, skins removed, and chopped fine, divided
About ¼ cup powdered sugar
Combine flour, baking powder, and salt in bowl. Set aside.
In a large mixer bowl, beat the butter, Nutella, and sugar until light and fluffy. Add eggs, vanilla, espresso and mix until well incorporated. Reduce speed to low and alternate additions of flour mixture and milk. Mix until just combined, not over beat the dough. The dough will be thick. Fold in 1/2 cup of chopped hazelnuts. Cover and refrigerate dough for about 2 hours.
Preheat oven to 375 degrees. Line two baking sheets with silicone baking mats.
Place remaining chopped nuts and the powdered sugar in a bowl. Shape the dough into 1 inch balls and roll them in the hazelnut mixture. Place on the prepared baking sheets. Bake until just set, 8-12 minutes. Do not over bake. Cool 5 minutes, then transfer to wire racks to cool completely.
Recipe from The Church Cook
Subscribe to:
Posts (Atom)