Showing posts with label Raspberry. Show all posts

Friday, February 13, 2026

Berry Cheesecake Cookies

Cake mix-based cookies, with cream cheese, white chocolate chips, and freeze-dried berries. Photographed on a square plate with berry-colored chevrons.

For different occasions, I do try and pick a recipe that is fitting for the holiday. It is nearly Valentine’s Day, not something that we typically celebrate much, but still, it is nice to make something appropriate. I came up with the idea of berries and cream cheese. I had one recipe saved, but when I looked more carefully, I feared that it was one of those AI recipes. I had no faith that the cookies would look like the image, so I looked for a new recipe. 

This recipe had similar elements and was posted by a known blogger several years ago, so I wasn’t worried. Is that what AI has done? It makes me trust nothing that is current, as so much can be created. It is so frustrating. These cookies start with a cake mix, then contain freeze-dried berries and cream cheese, which were elements from the original recipe I had found. 

These come together quickly, and the dough is fairly thick. I was worried that I would crush the freeze-dried berries too much, but they held up well. I couldn’t find freeze-dried raspberries, so I used a berry mixture. I think I liked it more, as it gave the cookies some variations in colors. These are soft, so it can be difficult to gauge that they are baked, so I did bake mine on the longer side. They remain soft, which is ok. The cream cheese gives these a hint of cheesecake flavor, and the fruit adds bites of sweetness.

Berry Cheesecake Cookies
1 vanilla cake mix
8 ounces cream cheese, room temperature
1/2 cup butter, room temperature
1 egg
1/2 teaspoon vanilla
1.25 ounces freeze dried berries/raspberries
1/2 cup white chocolate chips

Heat the oven to 350 degrees. Line two baking sheets with silicone baking mats.

In a large mixer bowl, combine the cake mix, cream cheese, butter, egg, and vanilla. Beat on medium until well combined. Stir in the freeze dried berries and white chocolate chips with a spatula. While the berries will break somewhat, be gentle so that they don’t completely turn into powder.

Shape the dough into 1-1/4” mounds. Flatten the top of each cookie slightly with the palm of your hand. 

Bake for 9-12 minutes, until set. The cookies will look undone, but will continue to set as they cool. Allow the cookies to cool on the baking sheet for 10 minutes before removing to a wire rack to cool completely. 

Friday, August 27, 2021

White Chocolate Raspberry Brownies

White Chocolate Raspberry Brownies

I will admit that the month is coming to an end, and I am already thinking about fall and Christmas baking! I know that the hot weather likely hasn’t left completely, but it feels different now, and the house doesn’t get so warm. I no longer fear that it will be too hot to turn on the oven, and that’s a good feeling. Still, I won’t immediately jump to maple, pecans, apples, and brown sugar, but those things are coming very soon.

While I don’t know what work will look like this fall, I do hope I will have more chances to bake for my work friends. I’ve been making such small batches and that works for many things, but sometimes you just want to make a big batch of cookies. These bars worked great, as the 8” pan only makes about 15 brownies, plus I was able to use some of the summer fruit that is out there.

This recipe called for fresh raspberries, but I used frozen ones, and they worked great. (Except for the raspberries that somehow stained the shirt I was wearing. What on earth?) This is a British recipe, which is why some measures are in grams and others by volume. Weighing ingredients is easiest, but some ingredients are too light to weigh. This recipe has you place the raspberries between two layers of brownie batter, which has its challenges! Do the best you can. These brownies are extremely rich, so cutting them in small pieces is completely appropriate.

White Chocolate Raspberry Brownies
½ cup butter
110 grams dark chocolate, chopped
2 eggs
225 grams sugar
1 teaspoon vanilla
¼ teaspoon salt
60 grams flour
2 tablespoons cocoa powder
100 grams white chocolate chips
1 cup raspberries
    
Heat the oven to 350 degrees. Line an 8” square pan with foil and spray the foil with nonstick cooking spray.

In a medium microwaveable bowl, combine the butter and dark chocolate. Microwave, stirring frequently, until the mixture is smooth. Transfer to a large mixer bowl and allow to cool slightly. Add the eggs, one at a time, beating well after each addition. With the mixer running on medium, add the sugar and mix until no longer grainy. Stir in the vanilla and salt.

Add the flour and cocoa powder and stir on low to incorporate. Remove the bowl from the mixer and fold in the white chocolate with a spatula. Spread half of the brownie batter in the prepared pan, and then top with the raspberries. Carefully cover the raspberries with the remaining brownie batter.

Bake for 28-32 minutes, until baked through, but not dry. Cool completely and then refrigerate before cutting into squares.

Recipe from Kitchen Mason

Friday, August 13, 2021

Raspberry Cookies with Lemon Glaze

Raspberry Cookies with Lemon Glaze

I was looking online for cookies to make, something with fruit as it is the heart of summer! I kept identifying recipes, but then I would check my blog and I’d realized that I had already made the recipe. Sometimes it’s been a few years, but I try to always try new recipes. This is surprisingly not as hard as it may seem. I finally whittled it down to two recipes, both using raspberries, and my husband chose this one.

I don’t often bake with strawberries and raspberries as fruit contains so much liquid, which often does poorly in baking. This recipe uses frozen raspberries, which I thought would fare better. Since my house is fairly warm, I took extra care to make sure the berries remained frozen. I measured what I needed, chopped them up, and then put them back in the freezer. I made the dough and only folded them into the batter once the oven was ready to go. It’s amazing how quickly the raspberries thaw, so be careful.

I had fears that these cookies would just melt in the oven and that there would be a big raspberry mess on my baking sheets. That didn’t happen at all, and the cookies baked up with no issues. They don’t change their shape all that much, which also means that they also don’t spread. You are supposed to use lemon juice and zest in the dough and juice in the glaze, but I kept it simple and only used zest in the dough. It’s hard to get the frozen raspberries perfectly distributed between the cookies, so some have more berries than other. I certainly like the ones with more berries, and don’t skip the lemon glaze as that adds a perfect zing!

Raspberry Cookies with Lemon Glaze
2 cups flour
1/2 cup sugar
2 teaspoon baking powder
1/2 cup cold butter, cut in pieces
2/3 cup heavy whipping cream
Zest of 1 lemon
1 cup frozen raspberries, chopped

1 cup powdered sugar
2 tablespoons lemon juice

Heat the oven to 350 degrees. Line two baking sheets with silicone baking mats.

In a large food processor, whirl the flour, sugar, and baking powder to combine. Add the pieces of butter and pulse until the mixture resembles coarse crumbs. Add the heavy cream and lemon zest and pulse to incorporate. Transfer the mixture to a bowl and fold in the frozen raspberries.

Scoop the cookies onto the prepared baking sheets, using a medium scoop.

Bake for 12-14 minutes, until set and slightly golden. Allow the cookies to cool completely on the baking sheets before transferring to a wire rack.

Once cool, make the glaze: in a medium bowl whisk the powdered sugar and lemon juice. Drizzle the glaze over the cooking in a crosshatch pattern.

Recipe from I Heart Naptime

Friday, May 28, 2021

Pink Lemonade Thumbprint Cookies


Pink Lemonade Thumbprint Cookies

I have come across a couple of different pink lemonade cookies in my searches, but I have to be really careful when I look at the ingredients. So many recipes use a couple of tablespoons of pink lemonade concentrate, which isn’t something that I have on hand, nor do I want to buy it and only use a small portion. This recipe was different, as it used lemon juice, lemon zest, and raspberries. However, these cookies have its own oddity.

The filling for these cookies uses 2 raspberries. How on earth are you supposed to get two raspberries? It’s such a weird quantity, and stores certainly don’t sell anything less than a pint or so. I ended up making this recipe sooner than expected because I bought some prepared mixed fruit, and it had a few raspberries mixed in. It was a nice surprise and I set those aside for these cookies. What else are you going to do?

These cookies, as they are a lemon shortbread, bake for quite a long time. You partially bake them, make and indentation, then finish baking. That’s a different process for me but isn’t difficult unless you accidentally hit the hot baking sheet! I wasn’t too sure that the mashed raspberry would become a nice filling for these thumbprints, but the filling came together beautifully, with a lovely pink color. The cookies have a great lemon flavor, not too sweet. The filling adds a burst of sweetness that can’t be beat.

Pink Lemonade Thumbprint Cookies

2 1/2 cups flour
3/4 cup powdered sugar, divided
1 teaspoon salt
1 cup butter, room temperature
2 tablespoons lemon zest
3 tablespoons lemon juice

1 1/4 cups powdered sugar
2 tablespoons lemon juice
2 raspberries, crushed
Additional powdered sugar

Heat the oven to 325 degrees. Line two baking sheets with silicone baking mats.

In a medium bowl, whisk together the flour, ½ cup powdered sugar, and salt; set aside. In a large mixer bowl, beat the butter, ¼ cup powdered sugar, lemon zest, and lemon juice on medium until light. With the mixer running on low, add the flour mixture and stir until the dough comes together.

Shape the dough into 1-inch balls. Freeze the dough for 15 minutes.

Bake the cookies for 10 minutes. Remove the cookies from the oven and make an indentation in the top of each cookie using the end of a wooden spoon or similar tool.

Return the cookies to the oven and bake for an additional 16-18 minutes, until barely browned on the bottom. Allow the cookies to cool on a wire rack.

While the cookies cool, make the filling. In a small bowl, whisk the powdered sugar, lemon juice, and raspberries. Dust the cookies with powdered sugar and then pipe the filling into the center of each cookie. Allow the cookies to set before serving.

Recipe from Inspired by Charm

Friday, April 24, 2020

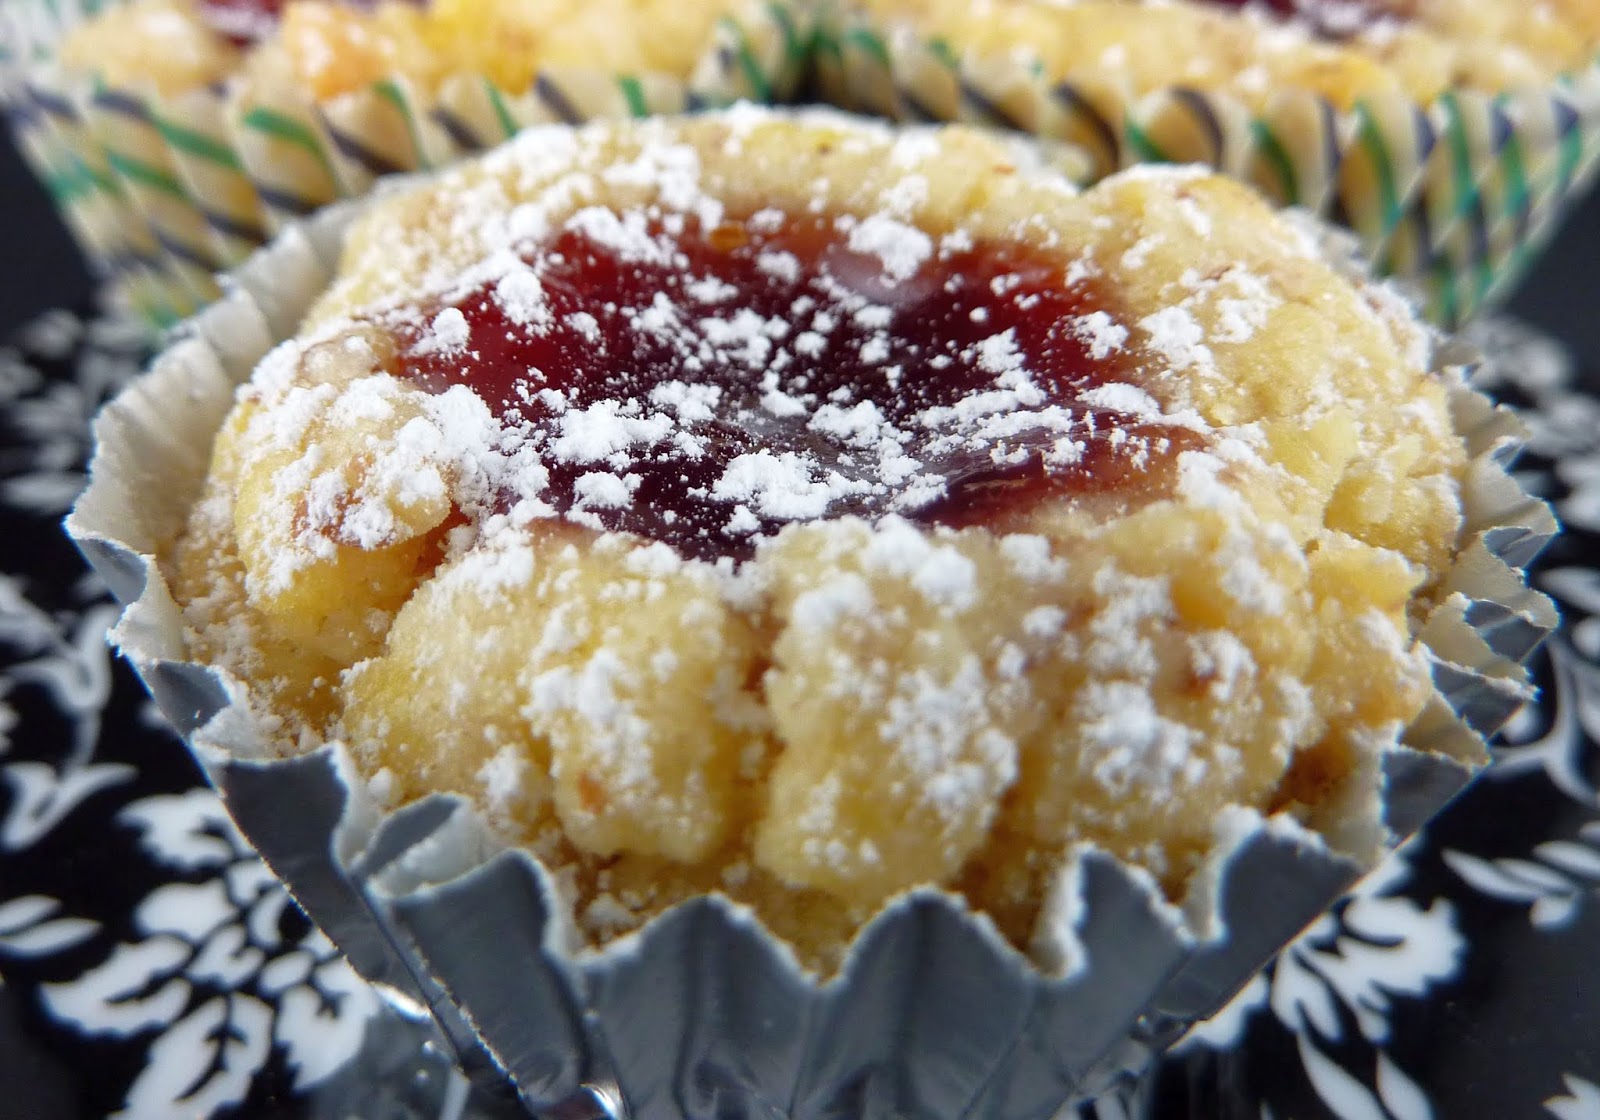
Raspberry Almond Tarts


I have a weird sense of time working from home. It seems like every day is so packed and the days are long. But then I get to the end of the week and it feels like, wow, where did it go? I’ve had a couple of days where I’ve had fewer meetings and I’ve been able to work on other projects, which was so nice. Maybe someday I will catch up with all the things I need to do. Probably not!

The worst part of the end of each week is that I don’t get to take cookies to work. So many folks have said they love the cookies that I bring every Friday. I am still baking, and even baking a little extra to use up different ingredients that we have around. Occasionally I post a photo of what I have made for the online forum we use for work, but I don’t want people to feel bad. I try not to make too many cookies, so this recipe, as written, makes 24 tarts, but I cut that in half to make a dozen.

The original recipe called for the use of the food processor. Unfortunately, I have a small (2 cup) food processor, and a huge one (12 cups) and there is no in-between. I ended up using a mixing bowl and it worked. I did end up adding an egg yolk, as my dough was too dry. That seemed to do the trick. I ended up using cherry preserves, as we didn’t have any raspberry. I like cherry better as there are no pesky raspberry seeds. I could have used any number of different flavors, but I think any preserves that are red are the best. These are lovely little cakes, and they were easy to make!

Raspberry Almond Tarts
1 cup flour
1/2 cup almond flour
1/3 cup sugar
1/4 teaspoon baking powder
1/4 teaspoon salt
1/2 cup butter, cubed
1/2 teaspoon vanilla
1/4 teaspoon almond extract
1/2 cup raspberry jam, or other flavor
Powdered sugar

Heat the oven to 350 degrees. Line a mini-muffin pan with paper liners.

In a mixer bowl, beat the flour, almond flour, sugar, baking powder, and salt. Add the butter pieces and stir until crumbly. Add the vanilla and almond extract and mix until the dough comes together. If the dough is exceptionally dry, add an egg yolk to help the dough come together.

Shape the dough into 1-1/4-inch balls and place in the prepared mini-muffin cups. Make an indentation in the top of each ball with your thumb or the end of a wooden spoon.

Fill the indentations with jam, overfilling slightly.

Bake for 13-15 minutes, until set. Allow the cookies to cool in the pan at least 20 minutes. Dust with powdered sugar before serving.

Recipe from Lovely Little Kitchen

Friday, October 26, 2018

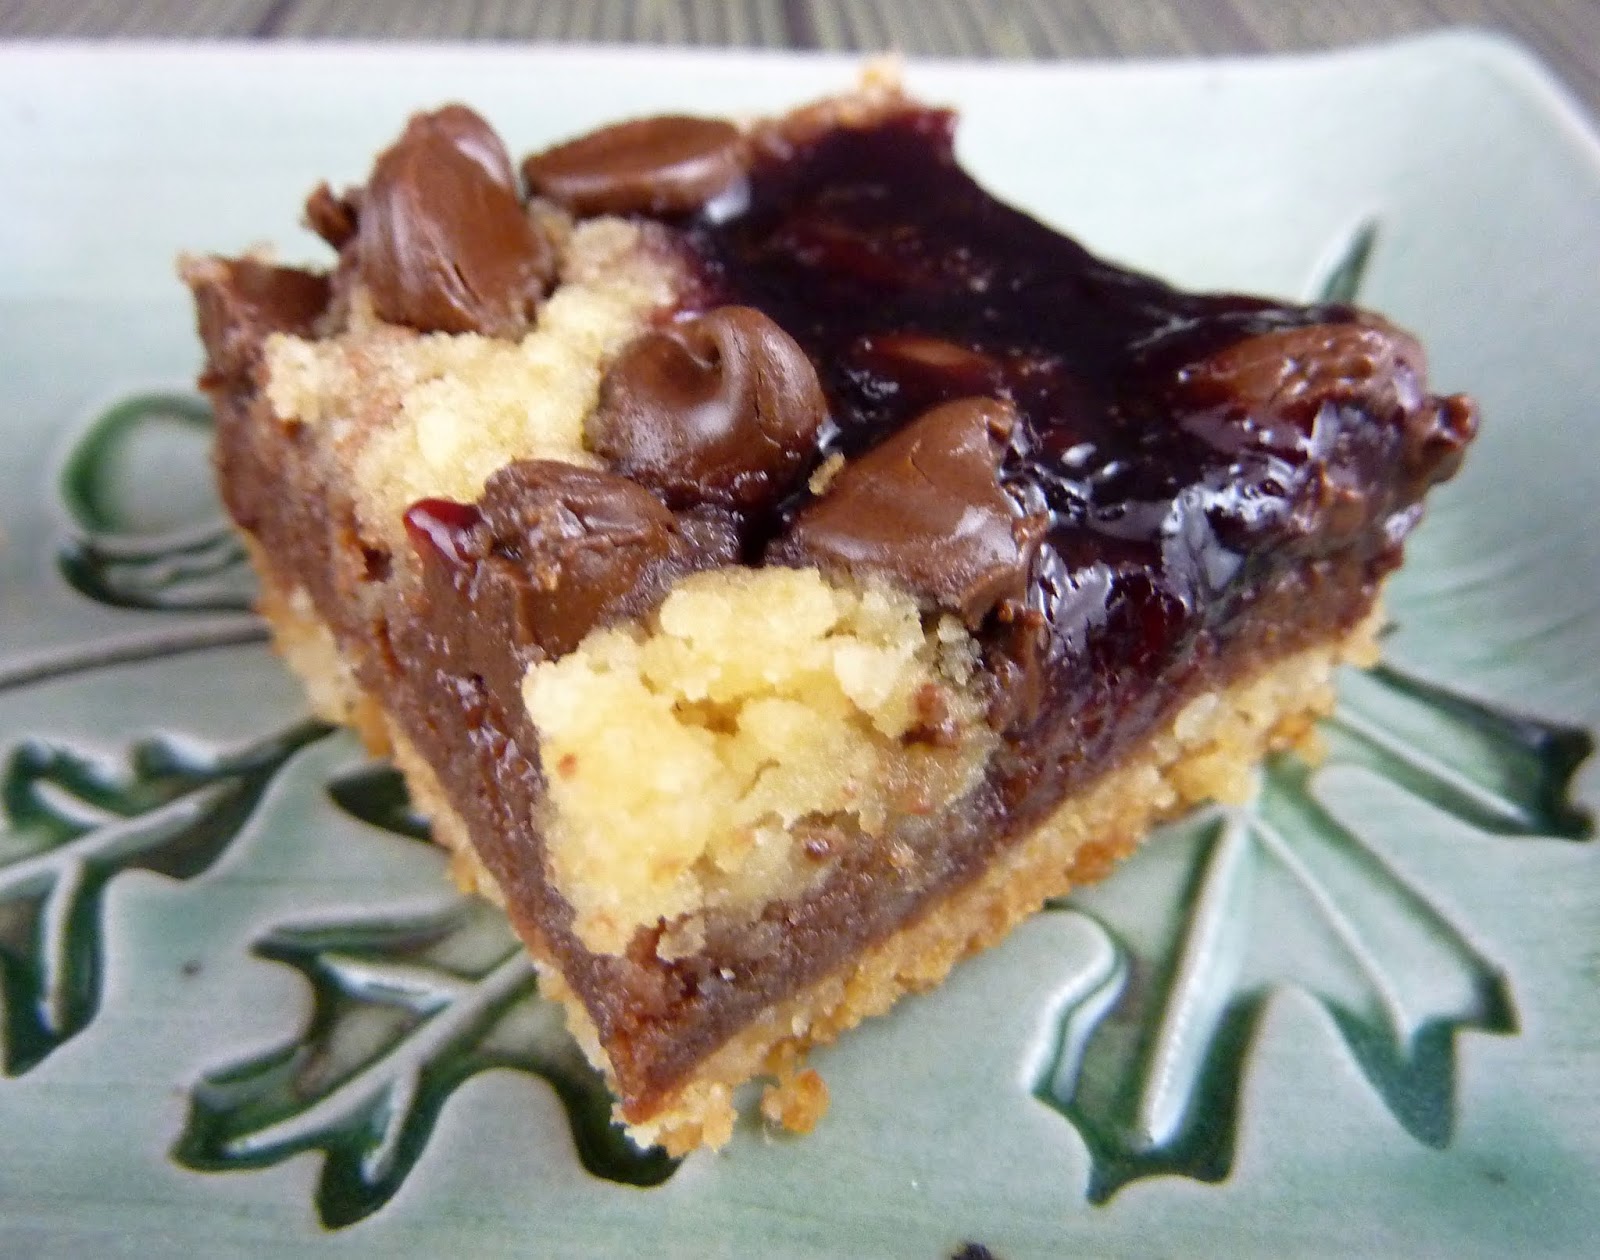
Chocolate Raspberry Bars


It’s the time of year when I start thinking about what I hope to bake for Christmas, but there is still some time to go before I start my Christmas baking. I always hope to do a lot of fall baking, but it seems like this year I’ve had no time, which is frustrating. I haven’t done any of my normal apple/caramel/spice cookies. It’s not that I haven’t found any of those fall recipes, I just haven’t got to them. It seems like a theme lately, oh well.

Ages ago I made a chocolate raspberry bar, that I also think had white chocolate. I don’t remember a lot about them, just that once the chocolate set they were impossible to cut. What a thing to remember! That was long before I had a blog, so I’m not even sure where that recipe was from. That’s one nice thing about keeping up my blog, it serves as a good record of what I’ve baked and where the recipes came from.

I was able to use my new food processor for this recipe. The one I used to use finally broke, but it was from 1980 so it lived a good life. I had picked up a new one this summer and finally got it out of the box. The food processor makes quick work of making the crumb mixture, but you could also use a stand mixer. The chocolate and sweetened condensed milk is a nice layer, but is fairly sweet. Make sure that you use seedless jam, as the seeds would really detract from these bars. You could try other flavors of jam/preserves, as otherwise the components of this recipe provide a good base.


Chocolate Raspberry Bars
2 cups flour
½ cup packed brown sugar
¼ teaspoon salt
1 cup cold butter, but into pieces
14 ounce can sweetened condensed milk
2 cups chocolate chips, divided
⅔ cup seedless raspberry jam

Preheat oven to 350 degrees. Line a 9” x 13” pan with foil and spray the foil with nonstick cooking spray.

In the bowl of a large food processor, add the flour, brown sugar, salt, and butter. Pulse the food processor until the mixture becomes crumbly and sticks together when pressed. Reserve 1-1/2 cups of the crumb mixture; spread the remaining crumb mixture evenly into the bottom of the prepared pan.

Bake for 12 minutes. While the bottom crust bakes, make the topping. In a small saucepan, combine the sweetened condensed milk and 1 cup of the chocolate chips. Heat the mixture on low, stirring constantly, until smooth.

Once the crust has come out of the oven, spread the chocolate/condensed milk over the bottom layer. Top with the remaining crumb mixture. Drop the raspberry jam evenly over the crumbs, and the top with the remaining chocolate chips.

Bake for 30-35 minutes, until set. Cool completely before cutting into bars.

Recipe from Dear Crissy

Thursday, July 4, 2013

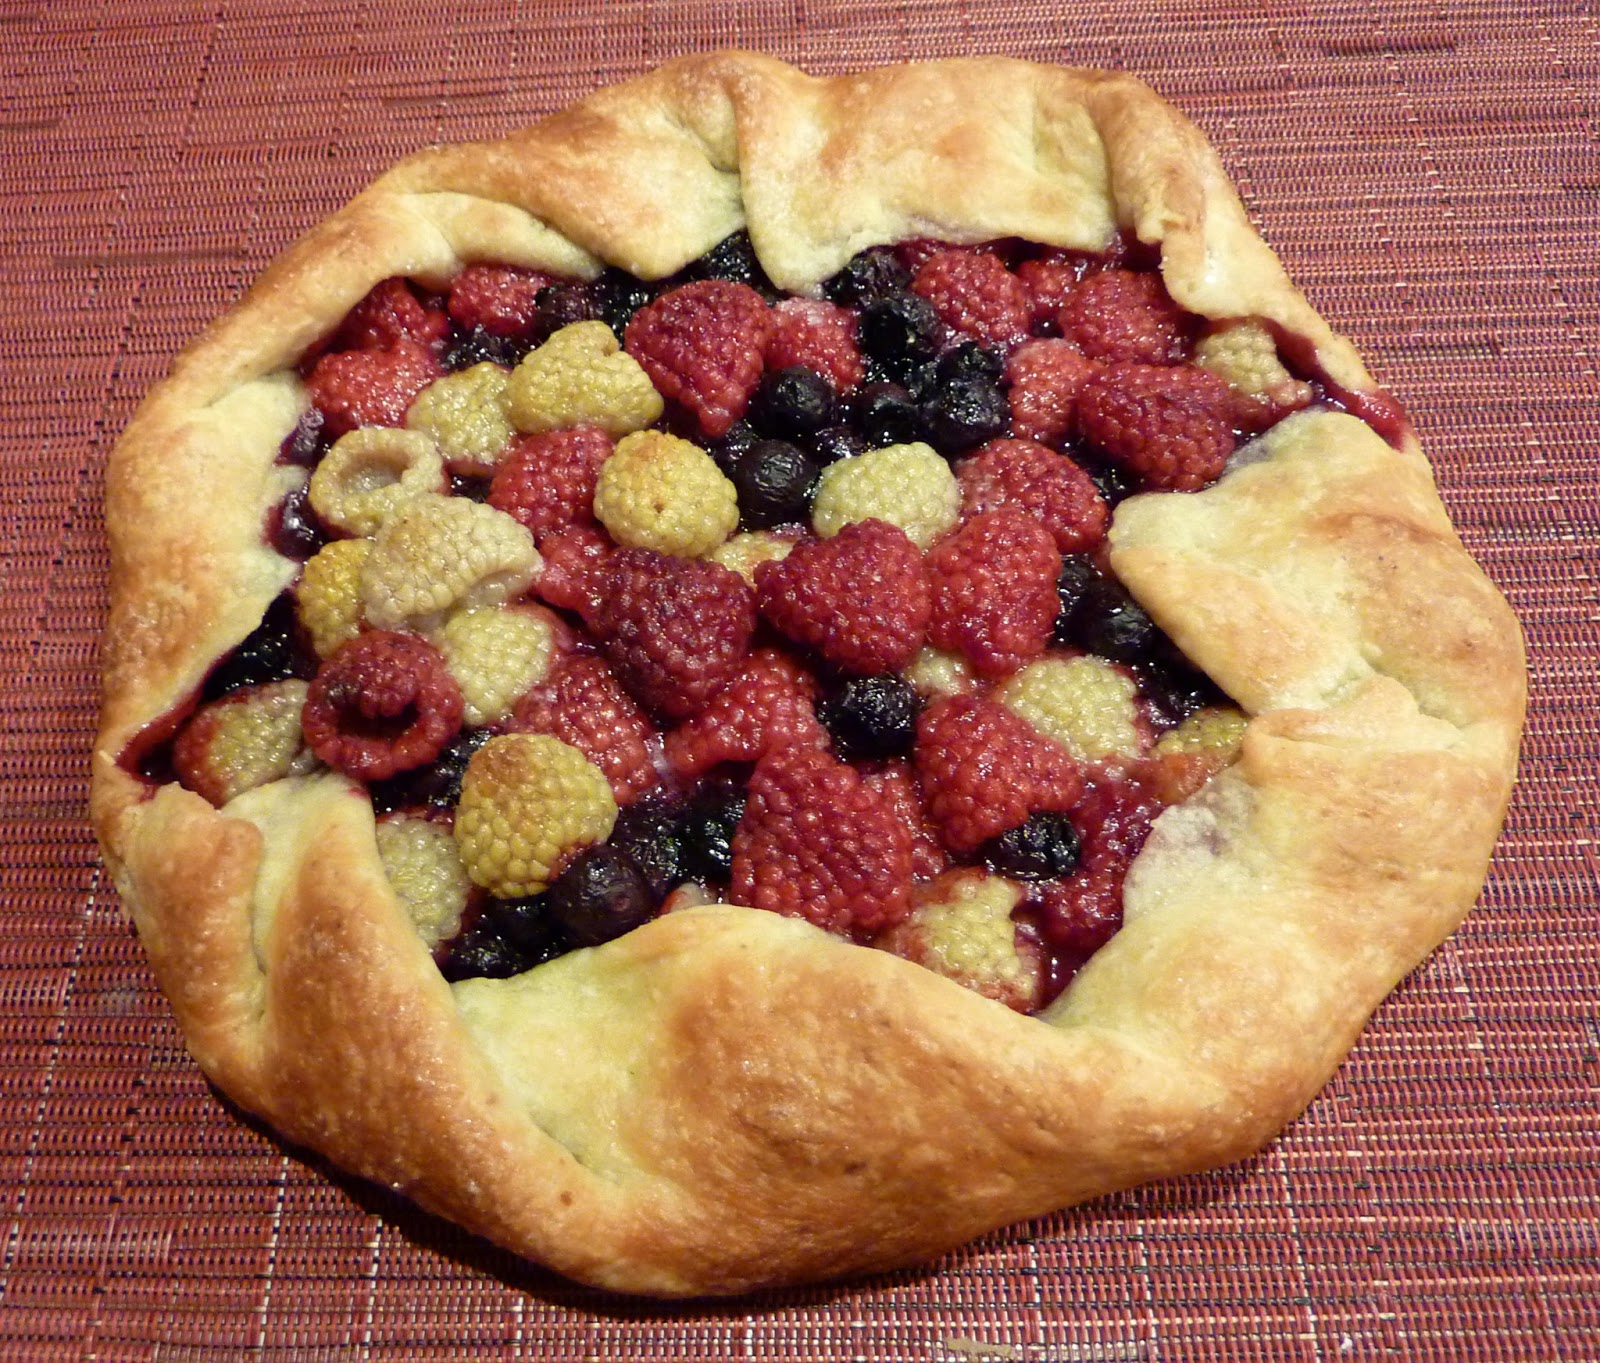
Red, White, and Blue Galette


I had some galette dough left over from making the Cheese and Tomato Galette and I wanted to make something festive for the holiday. The galette dough can be topped with any number of ingredients, sweet or savory, so it was my chance to be creative. I went to the store to see what fruit they had, and I noticed that they had white raspberries. I decided to make a red raspberry, white raspberry, and blueberry galette. Perfect for the 4th of July.

I don’t know that I have used white raspberries before, as they are usually super expensive. This tart doesn’t use very many, so it wasn’t too bad. The original recipe called for 1-1/2 cups of berries, but that didn’t quite seem like enough, so I have increased the quantities a bit. This tart is very forgiving and can be adapted in almost any way that you can think of, so use your creativity! 

This is a lovely little dessert, perfect for 4 or so people. It doesn’t keep well so you would need to serve it right away. It isn’t too sweet, but you could add ice cream or sweetened whipped cream if you wanted to make this dessert a little more decadent. I’ve made a couple of different galettes, and they always are easy to assemble and taste great!


Red, White, and Blue Galette
3 tablespoons sour cream
1/3 cup ice water
1 cup flour
¼ cup cornmeal
1 teaspoon sugar
½ teaspoon salt
7 tablespoons butter, cut in pieces

¾ cup red raspberries
¾ cup white raspberries
½ cup blueberries
1 tablespoon sugar
1 tablespoon butter
Sugar

Make the dough: in a small bowl, stir together the sour cream and water; set aside. In a food processor, combine the flour, cornmeal, sugar, and salt. Add the butter pieces to the food processor and pulse about 10 times, until the mixture is crumbly. Turn the food processor on and add the sour cream/water mixture. Process just until the liquid is distributed.

Remove the dough from the food processor and divide in two halves. Shape each half into a disk and wrap with plastic wrap. Refrigerate for 2 hours or up to several days. For this recipe, you will only use half of the pastry.

Preheat oven to 400 degrees. Line a baking sheet with a silicone baking mat.

Roll out one disk of pastry on a flour surface to an 11-inch circle. Transfer the pastry to your baking sheet.

In a large bowl combine the berries and sugar. Spread the berries on top of the dough, leaving a 3-inch border.  Cut the tablespoon of butter in small pieces and scatter the pieces on top of the berries. Fold the edges of the dough up over the filling; the dough will naturally pleat as you progress. Brush the edges of the galette with water and sprinkle with additional sugar.

Bake for 30-40 minutes, until the galette is golden. Cool on the baking sheet for 10 minutes, then remove to a wire rack. Serve warm or at room temperature. This is best eaten fairly soon after baking.

Recipe adapted from Baking with Julia by Dorie Greenspan